Showing posts with label Jellies. Show all posts

Friday, November 21, 2014

Delush Supreme Scream Collection

*Disclaimer
Hello dolls!

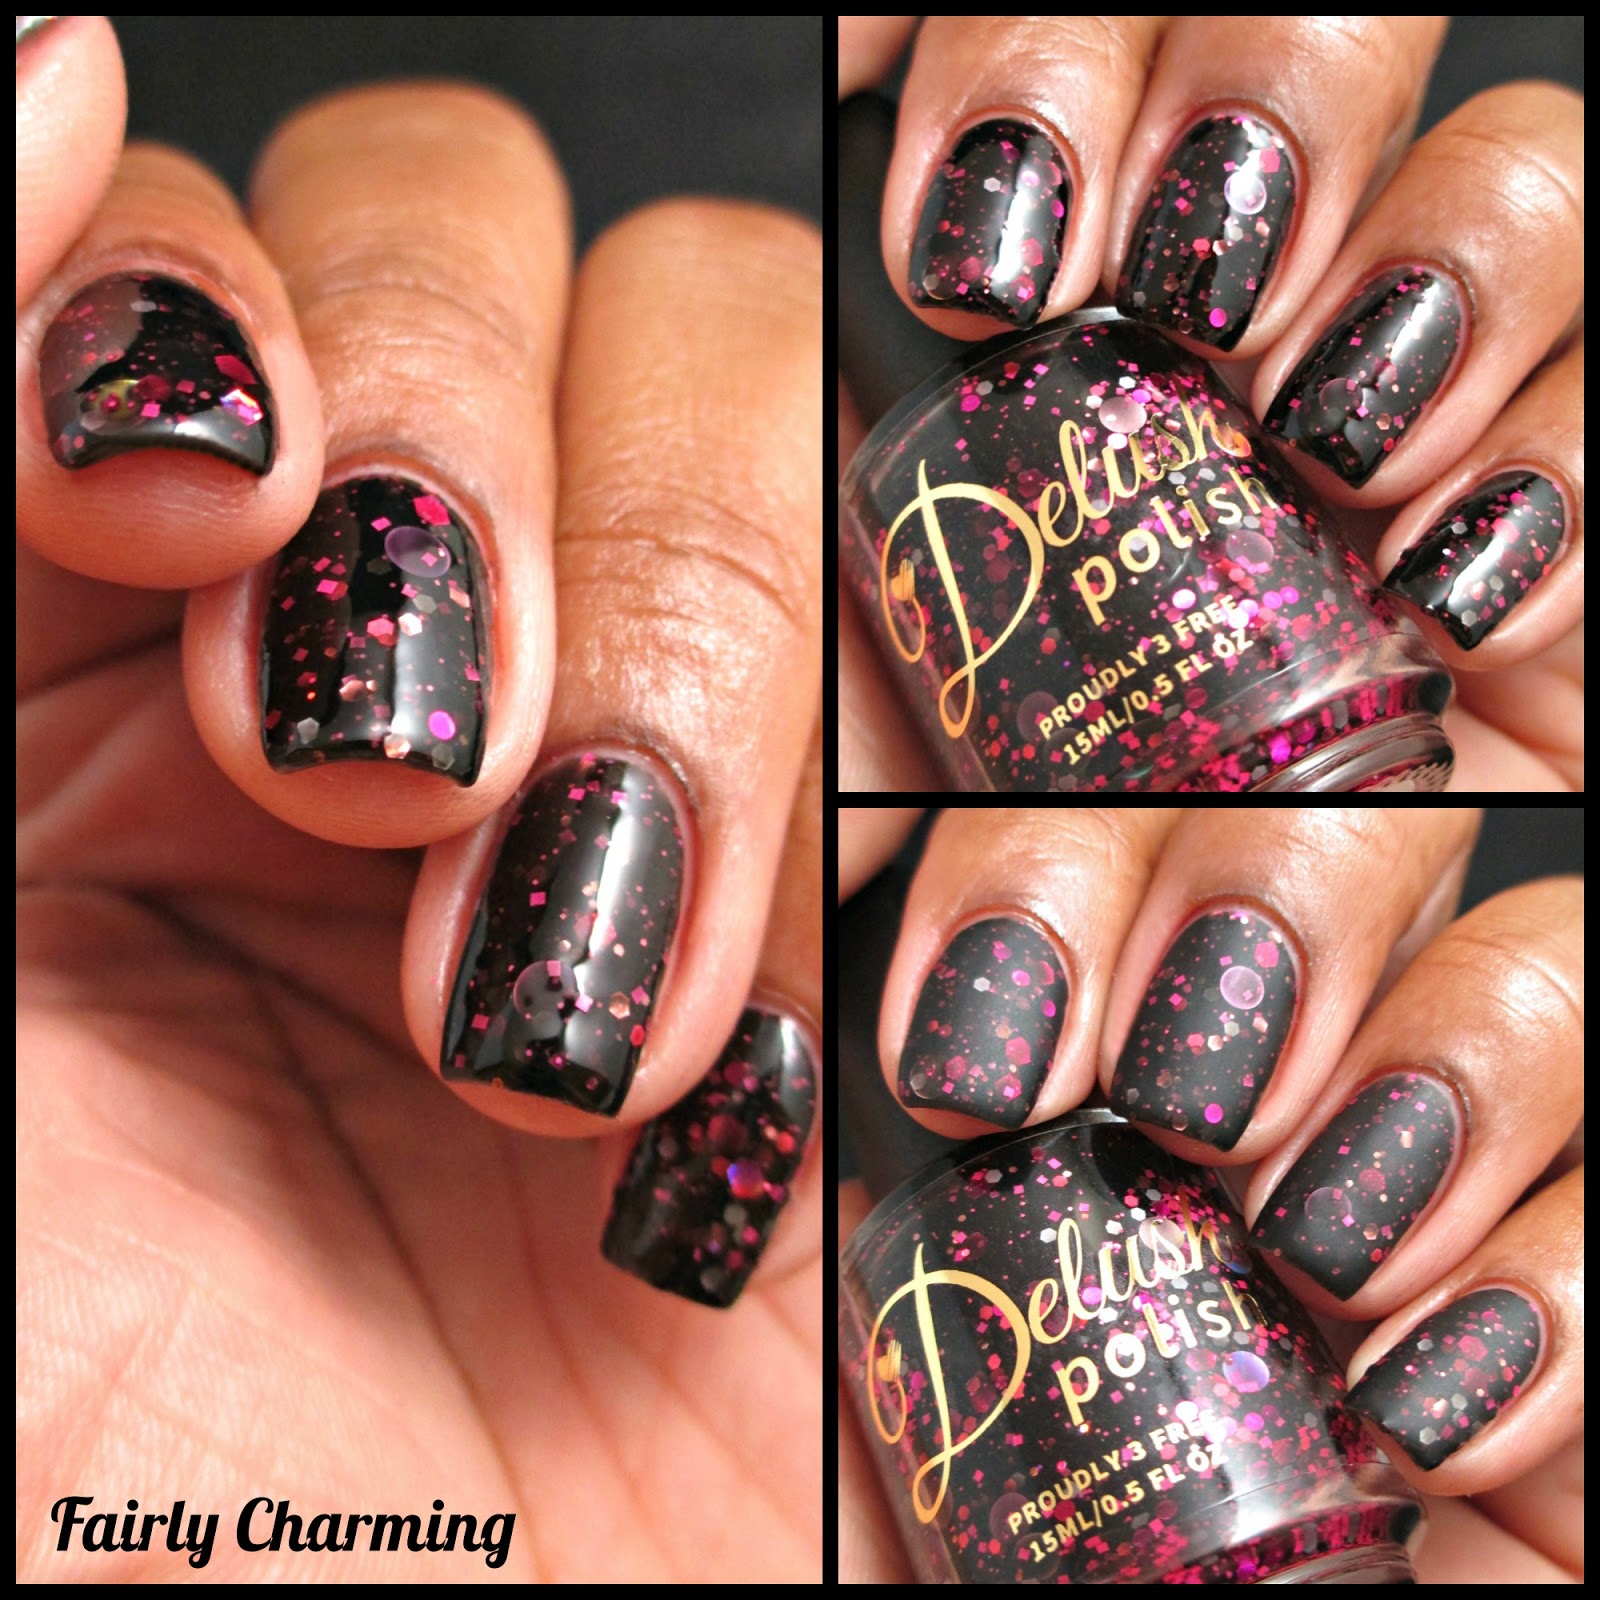
It's been a cool minute since my last post, but I'm back with an epic swatch fest... get excited!  Today's collection is brought to you by Delush Polish and I'm obsessed.  The Supreme Scream Collection is inspired by the show American Horror Story.  While I have never watched the show (I'm a big scaredy pants), I think these glitter-packed polishes are on point!  They look amazing both glossy and matte, so I'm showing you those options as well...

Delush Polish - Bitchcraft

More after the jump...

Sunday, October 19, 2014

SAFS: Dragon Claw Polish!

*Disclosure

Hello lovelies!

Welcome to another edition of "Sunday's Are For Swatching"!  Today's swatches are brought to you by a new indie brand on the scene, Dragon Claw Polish...


Dragon Claw Polish is launching their brand with 3 collections starting November 7th.  I received one of the collections to swatch and share with you, my lovely readers :)  This grouping of four beauties is called "The Girls of Famous Asian", inspired by four of the girls that maker Janet works with at a restaurant she runs...

 Dragon Claw Polish - Nessa

Nessa is described as a gorgeous, vampy, quiet person with a touch of flair!


 This is a lavender chrome jelly with a nice mix of scattered holos that really sets the polish off.  It is sheer when first applying, but with 2 coats opacity was easily achieved.

 Dragon Claw Polish - Bren

Bren is describe as a hard working person.  Like a great pair of denim jeans; she is reliable and can hold up to anything!


This is a sparkly, denim blue polish that was a dream to apply!  It is packed with blue micro glitter that were a breeze to clean up in my "messy spots".  Two coats shown.
 Dragon Claw Polish - GEO

GEO is described as a smart, edgy, hard worker with a touch of glamorous attitude!


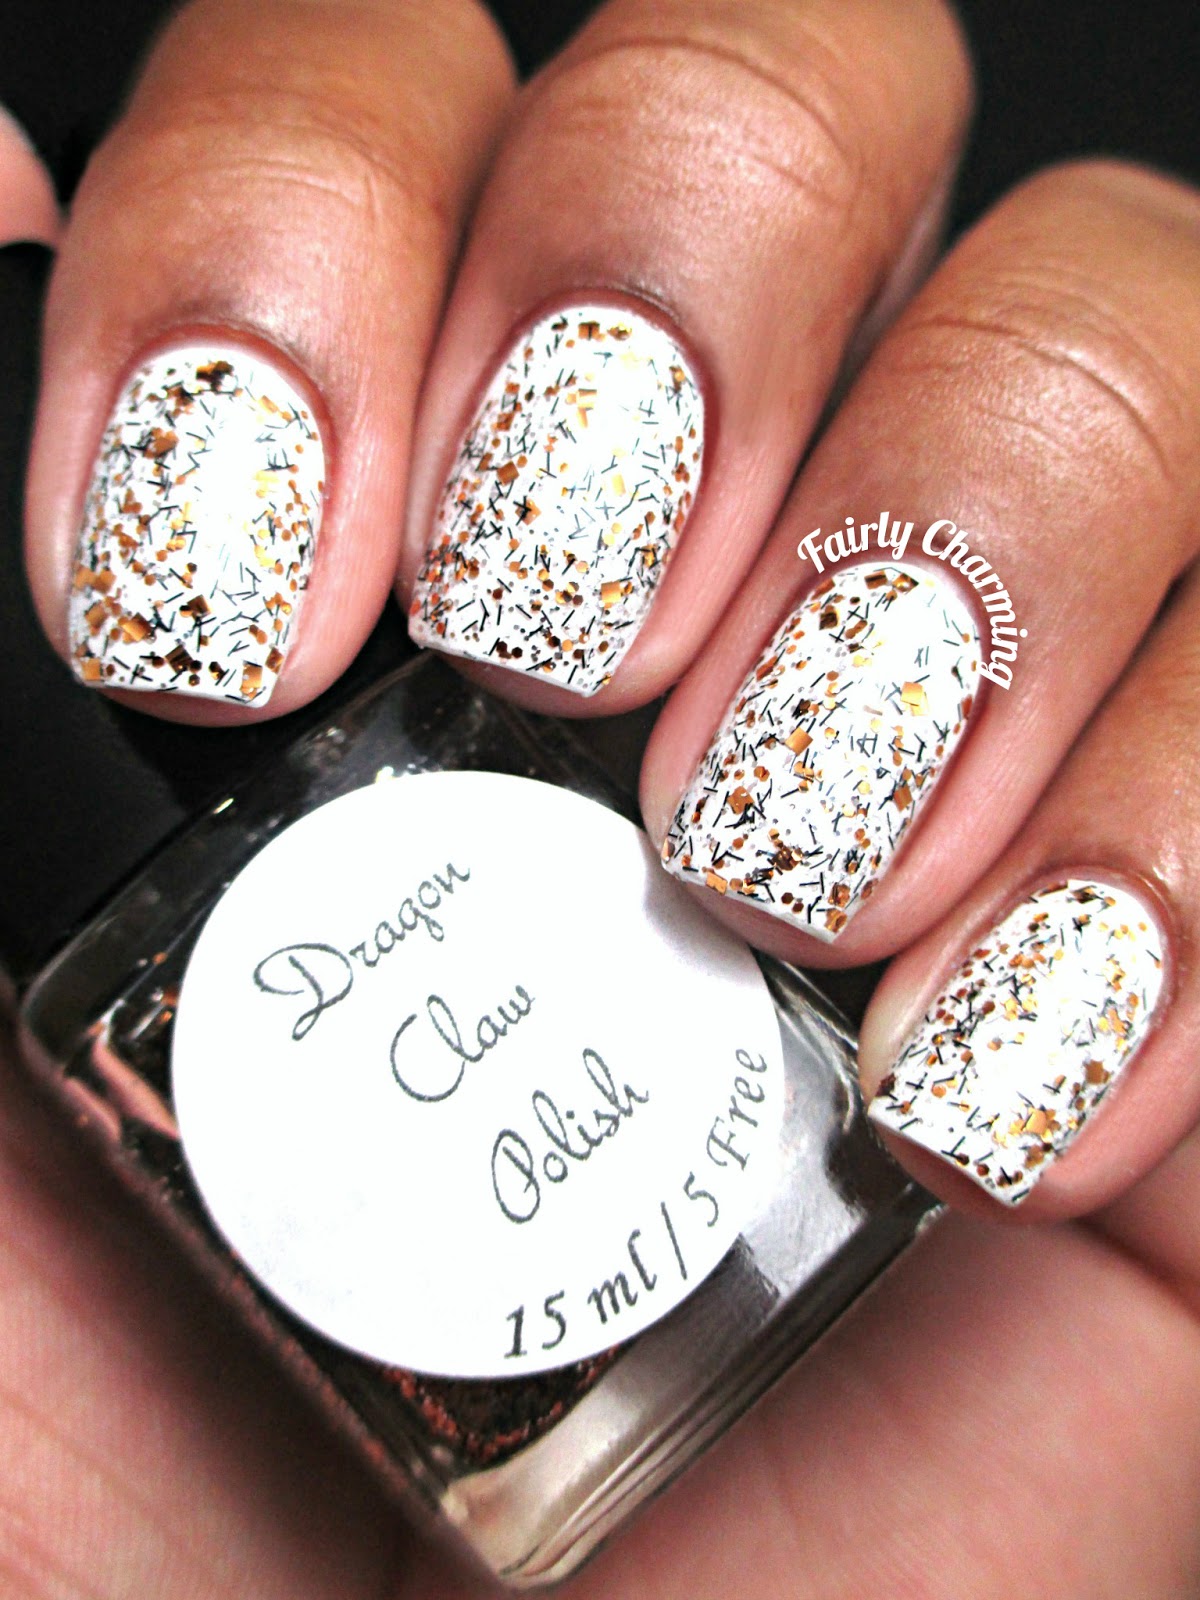
This polish is a mix of black stripe, gold square, gold hex and micro silver glitters in a clear base.  I applied 2 coats over a white base.  The glitter smoothed out very nicely when top coated (I will talk more about the top coat at the end of this review...)

 Dragon Claw Polish - Bea

Bea is described as a happy and friendly person who gives off a positive and calming vibe :)


This polish is definitely my favorite of the four!  It is a gorgeous cerulean blue with bright hex and micro holo glitter mixed in.  This is anothe sheer jelly that built up beautifully in 3 thin coats.  I had difficulty getting the bright hexes out with the brush.  I had to do some fishing and glitter placement, but it was worth the effort because this polish is just so pretty!

Dragon Claw Polish - Diamond Claw Top Coat

Now I have to tell you about this top coat... Oh my word is it amazing!!  I applied it over each polish that I swatched and it's probably one of the fastest drying top coats I've ever used (which is saying a lot since it took me about 2 years to find my staple top coat!).  The very first time I applied it, I was in shock.  By the time I got to painting my pinky nail, my thumb was already dry to the touch!  Even more than that, the top coat passed my "3 minute rub test" where I rub my thumb 3 mins after application.  There was no smudging.  None!  To top it all off, 10 mins after that I did the "smush/fingerprint test",  and while some firm pressing did leave an imprint on my nail, before my eyes the imprint refilled itself like it was receiving a botox injection and went back to it's smooth and glossy state.  Amazing!!


Over all I was pleasantly surprised by this new brand.  I am so excited to see what happens in it's future! 

As stated previously, these polish will be available for purchase HERE on November 7th along with the other 2 collections.  You can follow Dragon Claw Polish on Facebook for updates and product news :)

Until next time!

Stef <3


* This product was provided to me for review.  I received no payment or other compensation for the review of this product.  The opinions stated here are completely my own.  The contents of this review are based on my direct experience with this product.

Saturday, October 18, 2014

Black Widow, Baby!

Hello dolls!

Happy Saturday!!  I'm so glad it's the weekend... sooooo glad haha.  It finally feels like Fall her in Southern California and I couldn't be happier :) 

I've been a little busy this week and I finally found time this morning to edit some more Halloween manis... woohoo!


 Colors Used: Painted Polish - Black Widow, Baby and Acrylic Paint

As you may already know, I am currently obsessed with Painted Polish's collection of holos.  They're unbelievable!!  I had the pleasure of meeting the maker, Lexi, at a nail blogger/indie maker meet-up in LA last weekend.  Not only is she sweet as pie, but I was able to *almost* round of my collection of her polishes.  "Black Widow, Baby" is a part of Lexi's Haloween Trio of holos and it's a black jelly base with holo glitter mixed in...


 I applied 2 coats and let it set (about 5 mins).  I then used the black widow decals, that Lexi provided with this trio, on me ring finger.  With a thin striper, I painted my webs and spider and then I top coated.  Simple, just how I like it hahaha.

Love that holo!!


I saw on IG yesterday that Lexi is restocking the Halloween Trio along with some of her other polishes tomorrow at 11am PST.  So make an alarm for yourself and jump on it!  These do sell out quick (I speak from personal experience... there's a reason why I brought cash with me to that meet-up!).  Painted Polish can be purchased HERE :)

Until next time!

Stef <3

Tuesday, September 16, 2014

Spellbound Nails' Give Up the Ghost Collection!

Hello dolls!

It's that time of year again when the air starts to chill, the sun goes to bed sooner and the spooky-scary's come out to play.  It's also the time of year when the Indies release their Halloween collections!

I'm pretty sure I look forward to Indie holiday releases more than anything else.  And no other Indie get's me swooning like Spellbound Nails ;)  Last year Ashley just about killed me with her "Hocus Pocus" inspired collection and this year is even better... she chose Casper!!  I have 2 of the Glow-In-The-Dark's to share with you (*disclaimer)...

 Spellbound Nails - Instant Primordial Soup Mix

Fist up I have Instant Primordial Soup Mix (you know, the goo that Casper's Father came up with to bring ghosts back to life). This polish is a red-orange jelly with orange holo glitter mixed in.  How perfect is this??!
!
  

I applied 2 easy coats with topcoat.  This beauty glows orange when charged (about 3 minutes)

 Spellbound Nails, Instant Primordial Soup Mix, GITD 
 Love it!


 Spellbound Nails, Get An Afterlife, GITD
 Spellbound Nails - Get An Afterlife

Get an Afterlife was the tagline used in promos for the movie!  This polish is a sheer baby blue crelly with holo blue and black hexes, holo silver squares and fuscia dot glitters.


 While this polish is very sheer, application was a cinch.  the glitters dispersed evenly and without issue.  I applied 3 coats with top coat.  Now bust out your sunglasses, because this stunner GLOWS bright blue...

Spellbound Nails, Get An Afterlife, GITD
 It's like staring at the sun!! If the sun were blue haha ;)


I know I say this all the time, but I seriously am in love with Spellbound Nails!  The quality of the polishes is always consistent, Ashley's customer service is unmatched and I go gaga for every collection she releases!  Give Up the Ghost Collection is currently available for pre-orders at Spellbound Nails' online store, with the full release being on September 27th. 


Until next time! 

Stef <3


* This product was provided to me for review.  I received no payment or other compensation for the review of this product.  The opinions stated here are completely my own.  The contents of this review are based on my direct experience with this product.
Tuesday, May 13, 2014

Some Floral Inspiration!

Hello dolls!

Today's post is inspired by a blogger who fueled my obsession with nail art, Chalkboard Nails!  I have admired Sarah's work for a long, long time and I've had her "Hawaiian Floral" nail art pinned to my inspiration board for over a year.  I finally got the perfect polishes (in my opinion) to execute the look...


 Colors Used: Polish My Life - Birthday Suit, Drip Drop Nail Paint - Prototype #211, L'Oreal - Jolly Lolly

Original credit for this idea and design goes to Mr. Candiipants who inspired Sarah and thus inspired me :)  I really love the way this turned out!  

       I used a couple of awesome indie polishes in this mani.  The base is an ivory creme from            Polish My Life and it's amazing; 2 even coats of perfection.  The mustard jelly is actually a prototype from Drip Drop Nail Paint that I received when I purchased a grab bag on her site.  I call it Tampico because that's how it looks in the bottle haha.


 After applying my ivory base, I went thru with my jellies and blotted out some petals using the brush from the bottle.  I then took stripers in 2 different shades of green and brushed on some leaves.  Lastly I went back with my ivory polish and a small dotting tool to apply some dots to the center of my flowers.  I top coated and that's it!  It really is much easier than it looks, I promise ;)

Definitely a new favorite!

I'm trying to slowly make the transition from Spring to Summer with my manis.  The last couple of posts were pretty... bright lol.  I'm so close to just doing a neon overhaul!  Maybe it's time for me to resurrect "Neon Week"?

Until next time!

Stef <3


* This product was purchased by me for review.  I received no payment or other compensation for the review of this product.  The opinions stated here are completely my own.  The contents of this review are based on my direct experience with this product.

Friday, April 18, 2014

Playing with Jellies

Hello lovelies!

Today I have a mani that started out as a fail but ended up being a winner!


Colors Used: L'Oreal - Jolly Lolly, Mango Mamma, Bananarama Love, Creme de Mint, Miss Pixie. Lilac Coolers, Julep - Hermione

I received the entire L'Oreal jellies collection for my birthday last month and I was so excited!  I decided I wanted to do a rainbow-y watercolor design with them.  Once I had it on tho, I didn't really like how some of the colors layered over each other.  The green and orange looked particularly like pond scum lol...
 

 I then said to myself, "Hey!  Remember when crackle was cool??".  So I pulled out a white crackle (Julep's Hermione) and went to town!  And I lurvs it!!

Winning!


I hope you all have a very good Good Friday!

Until next time!

Stef <3

Tuesday, April 15, 2014

Black Tie Parade

Hello lovelies!

Today I have a new-to-me indie to share with you!  I discovered Polish Addict Nail Color on Instagram and have loved swatches I've seen of her polishes.  I decided to do some simple glitter placement with one of my current faves...


 Colors Used: Rimmel - Black Satin, Polish Addict Nail Color - Black Tie Parade

Black Tie Parade is a mix of rainbow glitters in a black jelly base.  I layered 2 coats over a black on my ring finger...


I then used a dotting tool to pick up some individual glitter off of my palette (aka an index card haha).  I then "stacked" them on my curves ;)  Everything was topped with my mystery top coat that I got from a nail supply store and that I absolutely loooooove!!

Sometimes simple is best ;)


Wishing you all a fantabulous day... even tho it's Tax Day... you know, black is actually very fitting for today lol.

Until next time!

Stef <3

Saturday, March 22, 2014

OPI Sheer Tints

Hello dolls!

A very happy Saturday to you all!  I finally have an opportunity to sit down and post a mani that I did last week, using the new OPI Sheer tints :)

I stumbled across these beauties while on a blogger meet-up a couple of weeks ago and I had to have them all!  From L to R we have "I Am Never Amberrassed", "Be Magentale With Me", "Don't Violet Me Down" & "I Can Teal You Like Me"...

 Colors Used; OPI Sheer Tints, Spellbound Nails - Pishsalver (Drink Me)

I decided to try out the "watercolor" technique that I've seen being done with these polishes.  First thing I need to mention is that these polishes are thick like gel/jelly.  When I first was playing with them I tried to use a sponge... and ended up with cotton-candy like fly-away strings coming off of my nail beds.  It was a mess lol.  So then I went back to the drawing board...


I started with a white base and then used a nail art brush to start blotching on the colors.  I would soak my brush in acetone and then dip it into the polish on my palette; this allowed for a thinner consistency and easier layering/application.  I did end up with lots of bubble doing it this way tho (and I was about ready to hurl these polishes at a wall!! lol), so I pulled out Spellbound Nails' Pishsalver white glitter topper.  It was a vast improvement!

 So Springy!


Over all I feel like I can have a lot of fun with these polishes, but they are work.  I'll have to play with them some more in the future.  Has anyone else tried these polishes?  What's your experience been?

Until next time!

Stef <3


* This product was purchased by me for review.  I received no payment or other compensation for the review of this product.  The opinions stated here are completely my own.  The contents of this review are based on my direct experience with this product