Sunday, November 30, 2014

SAFS: Brooke Anderson by Gabriel Cosmetics

*Disclaimer
Hello dolls!

Happy Sunday to you all :)  For today's SAFS post, I have swatcheses from the Brooke Anderson by Gabriel Cosmetics Nail Collection to share with you.  I posted a press release about these polishes last month and am thrilled to have a couple to show you...

Gabriel Cosmetics - Hush Hush

Hush Hush is a steel grey, shimmery creme polish that definitely surprised me!  I'm not usually into shimmer polishes, but the formula and finish on this one is amazing.  It applied like butter and is practically a one coater (which we all know I LOVE!).  Shown is 2 coats with top coat.

 Gabriel Cosmetics - Shine Y'all

Shine Y'all is a holographic glitter bomb that certainly did not disappoint!  Application was a breeze and the holo shift/sparkle is to dies for.  This polish dances beautifully even in the dimmest of lighting.  It has definitely earned a place among my favorites in my collection :)  Shown is 2 coats with top coat.


The Brooke Anderson by Gabriel Cosmetics Nail Collection is available now through the holidays at www.gabrielcosmeticsinc.com and retail individually for $8.50.


I'll be back later on today with some swatches of my "untried" polishes that are in of some lovin' ;)

Until next time!

Stef <3


* This product was provided to me for review.  I received no payment or other compensation for the review of this product.  The opinions stated here are completely my own.  The contents of this review are based on my direct experience with this product.

Saturday, November 29, 2014

I Survived Black Friday!!

Hello lovelies!

Today I thought I would share the mani that I wore while "Black Friday" shopping.  My inspiration?  The crazy expletives I heard when my husband and I made the mistake of stopping by Wal-Mart on our way home from Thanksgiving dinner.  We just wanted to pick up a bag of hay for our baby bunny and what we got... mass chaos!  So, when we finally got home, I blacked out my nails and started to doodle...

 Colors Used: KBShimmer - Eclipse, White Acrylic Paint, OPI - Matte Top Coat

This was a pretty simple one.  I started with 2 coats of Eclipse and then with a detail brush, I painted my symbols with white acrylic paint.  Looking at a keyboard definitely helped haha.


I top coated with OPI's Matte Topcoat and that's it!

I'm a survivor!


On the plus side, I scored awesome deals on a sound bar, flannel sheets and a big fluffy bath robe.  Black Friday rocks!  Did you happen to catch any sales?  Or did you stay home like a sane person?

Until next time!

Stef <3

Thursday, November 27, 2014

Thanksgiving Gone Flannel!

Hello dolls!

Happy Thanksgiving to you all!!  I have a quick post to share with you today.  I haven't had a tone of time to spend on my nails this week, so I decided to keep my mani simple...

OPI, Christmas Gone Plaid, Flannel, Plaid, Nails, Nail Art, Nail Design, Mani
 Colors Used: OPI - Christmas Gone Plaid, Sally Hansen - White On, Acrylic Paint, OPI - Matte Top Coat

I simultaneously love and hate this mani lol.  I'm obsessed with this nail color right now; it's just perfect.  It applies like butter!


 I started with 2 coats of my base colors, with white for my accent color.  I painted 3 vertical green  stripes (center and both sides) with Christmas Gone Plaid and once it set I then painted 3 horizontal white stripes with acrylic paint.  To get the flannel look, I used a detail brush and went back with my green polish to apply diagonal lines in alternating boxes.  Doing this with nail polish was difficult, not gonna to lie.  I would recommend using acrylic paint for small detail work like this. But, alas.  

I topped my accent nail with OPI's Matte Top Coat and the rest of my nails with a Salon top coat I get from my local nail supply store

A little messy, but I'll take it!


Well, I'm off to go watch some Supernatural with the hubs before we head over to my parents house for family craziness lol.  Have a happy and blessed day :)

Until next time!

Stef <3

Wednesday, November 26, 2014

Moroccan Tile Nial Art

Hello loves!

Tonight's late night mani was inspired be the oh-so-fabulous Jessica of @lalalovenailart.  I've had the pleasure of meeting Jessica in person and she is just awesome :)  She created this look back in August and I've kept it lingering in the back of my mind as a must-do.  I finally got around to it last week...

 Colors Used - She Nail Polish - Dirty Red, Salon Perfect - Oil Slick, Acrylic Paint, Mentality Matte Top Coat

Jessica got inspired by some Moroccan tile she saw on the internet when she did her mani and I loved it.  I ended up choosing a color palette that gave this look a darker, more Gothic tone... but it still works right? ;)


I started with 2 coats each of my base colors and then with acrylic paint, I free-handed my pattern.  Using top coat and a dotting tool I applied my studs and then everything got topped with Mentality Polish Matte Top Coat.

I think I love this one <3


I hope you (in the States) have an amazing Thanksgiving!  I plan on gaining 10 pounds lol.

Until next time!

Stef <3

Friday, November 21, 2014

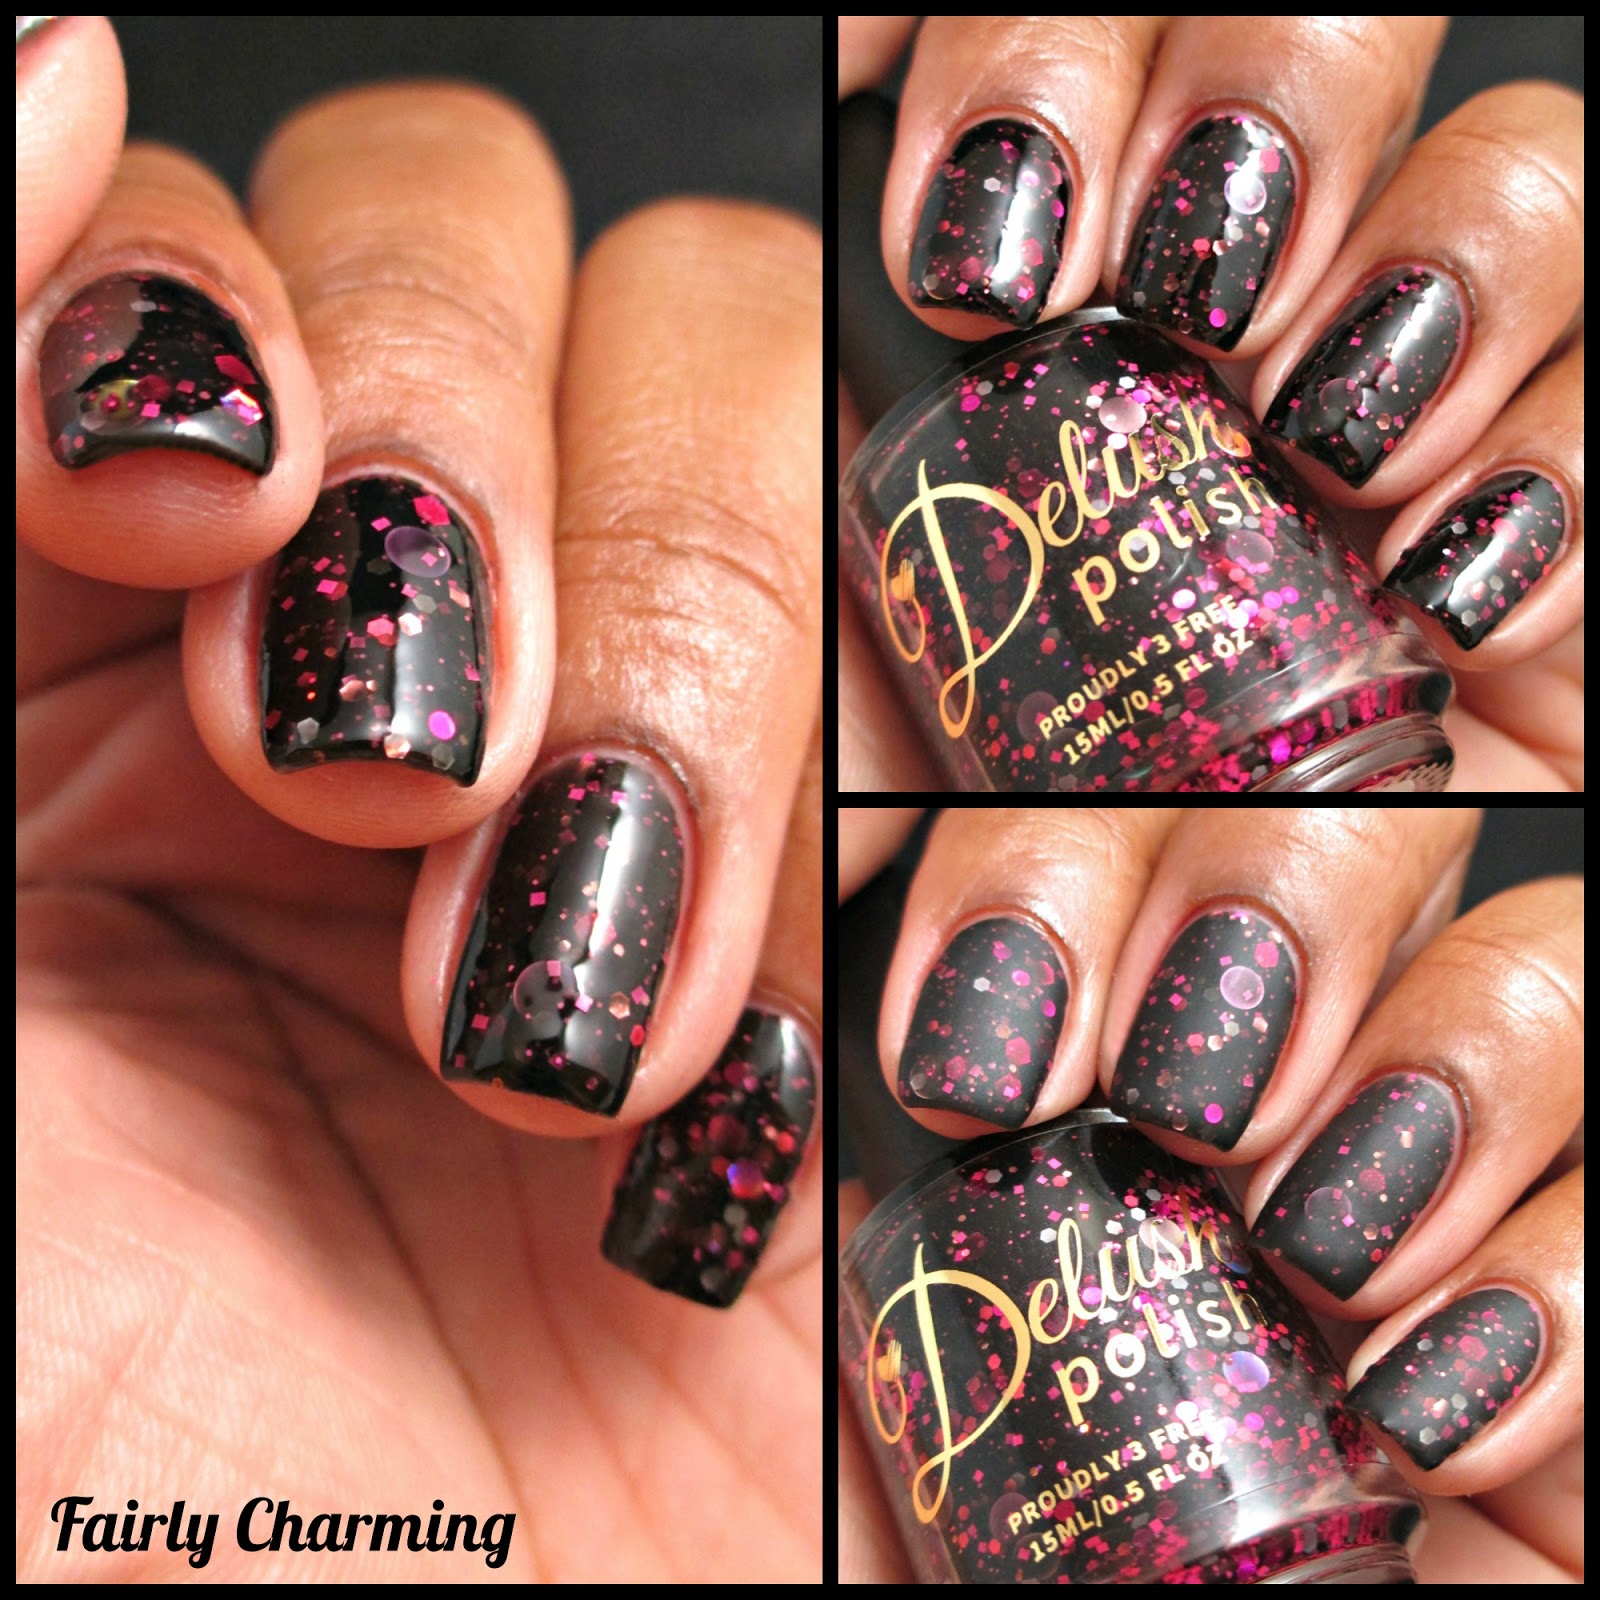
Delush Supreme Scream Collection

*Disclaimer
Hello dolls!

It's been a cool minute since my last post, but I'm back with an epic swatch fest... get excited!  Today's collection is brought to you by Delush Polish and I'm obsessed.  The Supreme Scream Collection is inspired by the show American Horror Story.  While I have never watched the show (I'm a big scaredy pants), I think these glitter-packed polishes are on point!  They look amazing both glossy and matte, so I'm showing you those options as well...

Delush Polish - Bitchcraft

More after the jump...

Thursday, November 13, 2014

My First Attempt at Houndstooth!!

Hellodolls!

I have a really quick post to share with you because I'm super excited that I actually did it, but I have to run to a rehearsal... agagagagaaahh!!


 Colors Used: Painted Polish - Holo Hangover, China Glaze - One Track Mind, Sally Hansen - White On, Acrylic Paints


 Ok so for a quick summation of this mani, I applied 2 coats each of my creme bases (CG and SH).  I then sponged on the glittery Holo Hangover (a technique I plan to go in depth with in a later post!).  Then I poured over multiple houndstooth tutorials I found through Google and with a detail brush and scrylic paint, I painted my design :)

 Whew, that was A LOT of work!


I hope you all have been having a fabulous week :)  I gotta run!

Until next time!

Stef <3

Wednesday, November 12, 2014

Nekkid Spaltter Redeux

Hello lovelies!

So guess who caught a stomach bug?  This girl did!  Sorry I've been M.I.A. :(  I had a busy busy weekend and then yesterday my stomach went south.. bleh!  But I promised nail art and so nail art you shall have...

 Colors Used: NPW Nail Art Pens

I decided to recreate a splatter mani that I did 2 years ago because a) I thought I could do it much better this go around and b) I'm pretty sure I've only used these pens one other time since then haha.  I found these pens at Urban Outfitters years ago, but I know that NPW products can be found online (Amazon, eBay and their website).


This look is pretty simple to create even though it may look a little overwhelming.  I just blobbed and pulled until I liked the splatter shape and then placed some dots at random.  It's supposed to mimic paint splatter so it really doesn't have to look "perfect".  This look could also be achieved with dotting tools or a tooth pick; nail art pens are not a must ;)

Colorful and fun!


Alright, I am off to go recoup!  I have a darker, more Fall-esque mani to share with you tomorrow, so stay tuned...

Until next time!

Stef <3

Saturday, November 8, 2014

A Spotted Bordeaux

Hello dolls!

I hope you all are enjoying a fantabulous weekend!  I was so excited that it finally got cool enough to feel like Fall last weekend and today... we're back to 90 degree weather.  I'm so mad!!  but, I'm not going to let the weather keep me down.  For today's mani I have a simple nail art look inspired by my new favorite color for this season, wine/burgundy...

 Colors Used: Revlon Parfumerie - Bordeaux, Julep - Felicity
I know that nude is the it color for Fall for 2014, but forget that noise.  I need color!!  So I decided I need to pick my own color for the season and this is what I went with ;)


 I started with 2 coats of Bordeaux which, when dry, smells of deep berry yumminess.  I then topped it with Mentality's Matte top Coat.  Once it dried, I took a dotting tool and applied Felicity and that's it!

Fall has arrived, even if California refuses to accept it!!  :P


If I get more time to myself, I will put together a SAFS post., otherwise I will be back next week with some more nail art...

Until next time!

Stef <3

Wednesday, November 5, 2014

Simply Beautiful Review

*Disclosure

Hey dolls!

Today I have some swatches from a new indie on the scene, Simply Beautiful :)  I was approach by maker Ashanti about swatching some of the polishes from her new brand and I happily obliged!


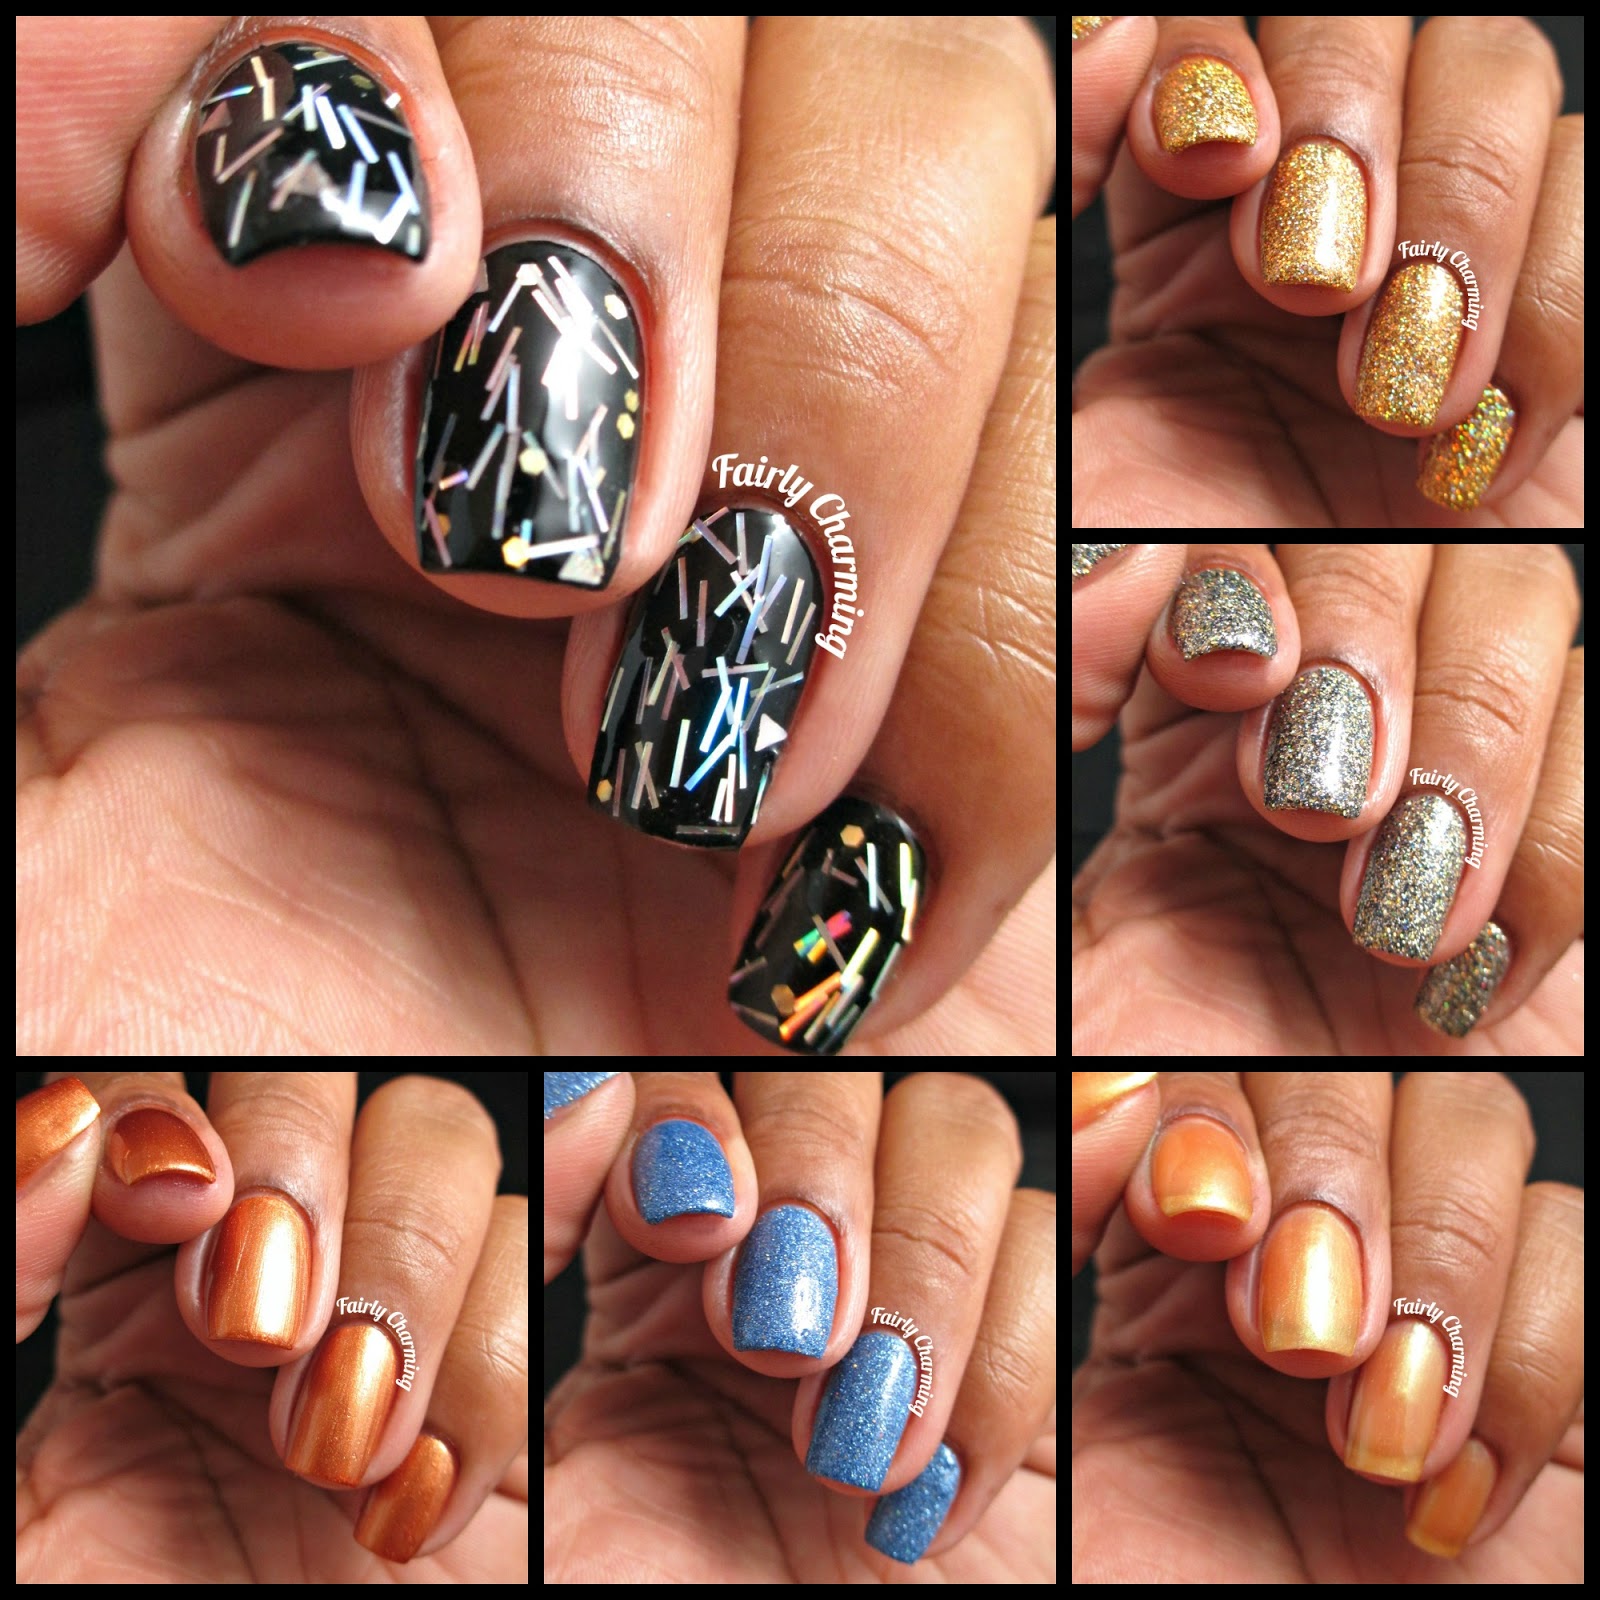
Ashanti's favorite color is gold, so I have a few variations of gold to share with you along with some micro glitters and a topper.  Let's get started!

 Simply Beautiful - Golden Bronze

Golden Bronze is a copper-leaning gold that was surprisingly creamy in application.  I applied 2 coats but could have easily gotten away with one.  I don't usually go for polishes like this, but I really enjoyed this one. It looked like shimmery butterscotch on my nails; good enough to eat haha.  Shown is 2 coats with top coat.


 Simply Beautiful - Periwinkley

Periwinkley is a polish jam-packed with blue micro and silver holo glitters.  The formula on this one is on the thicker side, so I used the dab and drag method when applying.  The pay-off was well worth it because it is a beautiful color!  Shown is 2 coats with top coat.

 Simply Beautiful - Old Gold

Old Gold is a sheer gold jelly with opalescent shimmer that shifts from yellow to green.  While I don't think it was flattering for my skin tone, it is a very neat looking polish.  I think it could be an awesome jelly-sandwich with a green glitter :)  Shown is 2 coats with top coat.

 Simply Beautiful - Sacred Diamonds

Sacred Diamonds is a mix of gray, black and holo silver glitters,  As with all glitter/glitterbomb polishes, the dab and drag method is highly recommended with this polish (especially as this polish is on the thicker side).  The sparkles in this polish certainly make it worth the effort :)  Shown is 2 coats with top coat.

 Simply Beautiful - Brilliance

Brilliance is a gold holo glitter polish. Of the 6 that I swatched, this ones's my favorite!  It's an Amazing compacted glitter polish; almost a 1 coater (swoon!).  The formula is excellent as well, very easy to use.  Shown is 2 coats with top coat.

 Simply Beautiful - Popping Bottles

Popping bottles is a fun glitter topper of silver holo stripe, triangle and hex glitters.  I expected to have some "fishing" issues because of the glitter shapes, but I was surprised to find this topper easy to work with.  Again, I used the dab and drag method to get an even spread of glitters on each nail.  This totally gives of a club vibe haha.  Shown is 1 coat over black with top-coat.


Simply Beautiful polishes can be purchased HERE and retail at $7.00.  Are there any colors that popped out at you?  Let me know in the comments below :)

Until next time!

Stef <3


* This product was purchased by me for review at a 72% discount.  I received no payment or other compensation for the review of this product.  The opinions stated here are completely my own.  The contents of this review are based on my direct experience with this product.

Tuesday, November 4, 2014

Loverly & Fairly Charming

*Disclosure

Hello dolls!

Today I have teamed up with Loverly to design a cute wedding nail art look!  When searching through their collection of gowns, I came across one that made me reminisce on my own wedding day.  Knee-length, ivory and sweet.  I didn't want any frills on my day, just the simple joy of sharing our vows in front of our loved ones.  My one regret is that my nails were kind of blah on my wedding day.  i was too stressed and too busy to do anything cute *tear*.  So when I was approach by Loverly to do this collab, I thought, "Yay!  I get a second chance!!"...

 Colors Used: Rica - Robin's Egg Blue, Sally Hansen - White On, Acrylic Paint

I decided to take the "something blue" approach using a Tiffany's blue color on my tips.  I then took a smaill dotting tool and applied white polka dots...


 With a detail brush and acrylic paints, I painted my bow.  Sweet and simple :)


 I really enjoyed working on this project and taking a stroll down memory lane...


I'm curious to know what you lovely ladies had on your nails for your big day?   Or what you plan on rockin' when you become a bride??

From what I can see, Loverly seems like an excellent reference for wedding planning and inspiration.  I highly recommend checking it out :)

Until next time!

Stef <3


*I received no payment or other compensation for the review of this website.  The opinions stated here are completely my own.  The contents of this review are based on my direct experience with this product.