Showing posts with label Gradient. Show all posts

Wednesday, August 27, 2014

Forrest at Twilight

Hello dolls!

So, I was sitting around yesterday trying to find some nailspiration and nothing was coming to mind.  I looked outside my window and the clouds were an array of purples, pinks and oranges.  I decided I would do a twilight gradient...


 Colors Used: Revlon Parfumerie - Wild Violets, Love & Beauty - Purple, China Glaze - Peonies & Park Ave, American Apparel - Manila, Black and White Acrylic Paint, Mentality - Matte Top Coat

This is one of those rare times where I'm wearing what I'm posting haha.  I can't stop staring at my hands!


I started with a white base of Sally Hansen White On, just one coat so that it would dry quickly.  I then layered my 4 polished on a make-up sponge and dabbed away.  After I cleaned up that whole mess, I painted some pine trees with black acrylic painy (my nerd of a husband said, "Oh! You painted confiers!").  I dotted the stars with some white acrylic paint.  I topped it all off with Mentality's Matte Top Coat and tada!

Makes me wanna go camping!


I think it's time for a nap, looking at these makes me sleepy.  It could also be the eucalyptus-mint candle that I've got burning haha...

Until next time!

Stef <3

Saturday, July 19, 2014

A Summery Gradient

Hello lovelies!

I hope your weekend is going well :)  Today I have a simple gradient to share with you.  I did this a few weeks ago and never got around to posting it... oops!


 Colors Used: Colors Club - Flamingo, China Glaze - Son of a Peach, OPI - I Just Can't Cope-Acabana, Spellbound Nails - Pishsalver (Drink Me)

I just love gradients!  I have to resist doing them all the time lol.  There are some really great tutorials on the interwebs for gradient nail art.  I find what works best for me is a good make-up sponge (I prefer the triangles from Target) and being sure to blend the colors; not only overlapping the polishes when applying on the sponge but slightly shifting the sponges position up or down the nail as I dab :)


I started with a white base and let it dry.  Sponging over polish that is still tacky is a nightmare, trust me haha.  I then layered my 3 colors on a sponge and went to work.  I usually go over each nail 3 times to reach full opacity.  After clean-up (the worst part of doing this nail art, even if I tape off my cuticles :\) I applies my oh so favorite white glitter polish from Spellbound Nails, "Drink Me"

Woohoo!

Enjoy your weekend dolls, I know I plan too ;)

Until next time!

Stef <3

Saturday, March 29, 2014

Neon Makes Me Happy!

Hello lovelies!!

How is your weekend going so far?  This is the first day I've had all to myself and it feels great!!  My hubby cleaned our home yesterday while I was at work (best present ever!!) so I've just been relaxing and doing my nails :)  I decided to play with some new purchases, gradient style ;)


 Colors Used: China Glaze - Strike A Rose and Flip Flop Fantasy, Julie G - 9 to 5

I started with a base of Jule G's "9 to 5".  I've seen lots of swatches of this neon peach polish and I've always wanted a bottle of my own.  So when I saw it on display while buying Dayquil the other day, I snatched it up haha.  Unfortunately after 4 coats the polish was still a streaky mess... argh!!  


 I moved on to Plan B... sponging!  From top to bottom it's layered CG's "Strike A Rose" (from the new City Flourish collection), "Flip Flop Fantasy" (a neon coral that I've loved forever) and then "9 to 5".  I used a triangular make-up sponge to stiple/blend the colors on my nails.  I then cleaned up my cuticles with a combo of Q-Tips, an angled brush and actetone.

 Totally makes me think of peaches!


Has anyone else used "9 to 5"?  I'm not crazy right??  Streak City bound!  Lol...

Until next time!

Stef <3

Tuesday, March 4, 2014

Back to Basics

Hello lovelies!

I've got a quick post for you today.  I'm getting my feet wet (or would it be nails wet?) with nail art again and decided to go back to basics.  I did a simple skittlette in a red, white and black theme.  I chose to use Shimmer Polish's "Cindy" again (*disclaimer)...


 Colors Used: Shimmer Polish - Cindy, Rimmel - Black Satin, Daisy Nail Lacquer - White Diamond

Cindy really is an impressive and fabulous red glitter.  I layered 2 coats of it over a red base on both my index finger and pinky.  I then sponged it over black  on my middle finger to get a glittering  ombre look.


I then did some simple polka dots on my ring finger using a medium sized dotting tool.  I topped it off with Duri's Miracote Fast Dry Top Coat.


For reals... if you are a lover of glitter polishes... RUN over to Shimmer Polish and get yourself some goodness haha.


Until next time!

Stef <3


* This product was provided to me for review.  I received no payment or other compensation for the review of this product.  The opinions stated here are completely my own.  The contents of this review are based on my direct experience with this product.

Thursday, February 6, 2014

I'm Lovin' Cobalt!

Hello, hello!

It's been over a week since my last post... yikes!  Life really has this annoying habit of getting in the way haha.  Anywhosy, I'm back and wanting to share with you my personal color of the year :)  I know that Pantone named "Radiant Orchid" as the It color for 2014, but for me this will be the year of Cobalt!

 (hand pose made famous by @mcpolish on IG :P)
Colors Used: Rimmel - Black Satin, Sinful Colors Nail Art - Time Off, Essie - Butler Please, Shimmer Polish - Alice

 Seriously tho, cobalt... gah!!  This nail art design was actually inspired by fellow blogger Polish Pals.
When I saw her do this mani back in January, I fell in love and stored it away for future nailspiration!
 

The majority of this mani was achieved using a nail art brush and a black striper.  For the glitter gradient I knew I had to use a Shimmer :)  These polishes are seriously so compacted with glittery goodness!  I used Alice, which is a mix of silver holos of different sizes.  I also found some stars floating around in the bottle which was a pleasant surprise! 


Yep, I'm loving everything about this mani!


I'm going to be a swatching fool this upcoming weekend so be expecting a swatch post on Sunday!  i also have some other goodies up my sleeve... stay tuned!

Until next time!

Stef <3

Tuesday, October 29, 2013

If I Were A Witch...

Hello dolls!

With Halloween right around the corner, I thought now would be a good time to share some "nailspiration"!  I read a fabulous post by Break Rules, Not Nails where she played with the idea of having witches nails.  I loved it and it got me to thinking what kind of nails I would rock if I were a witch...

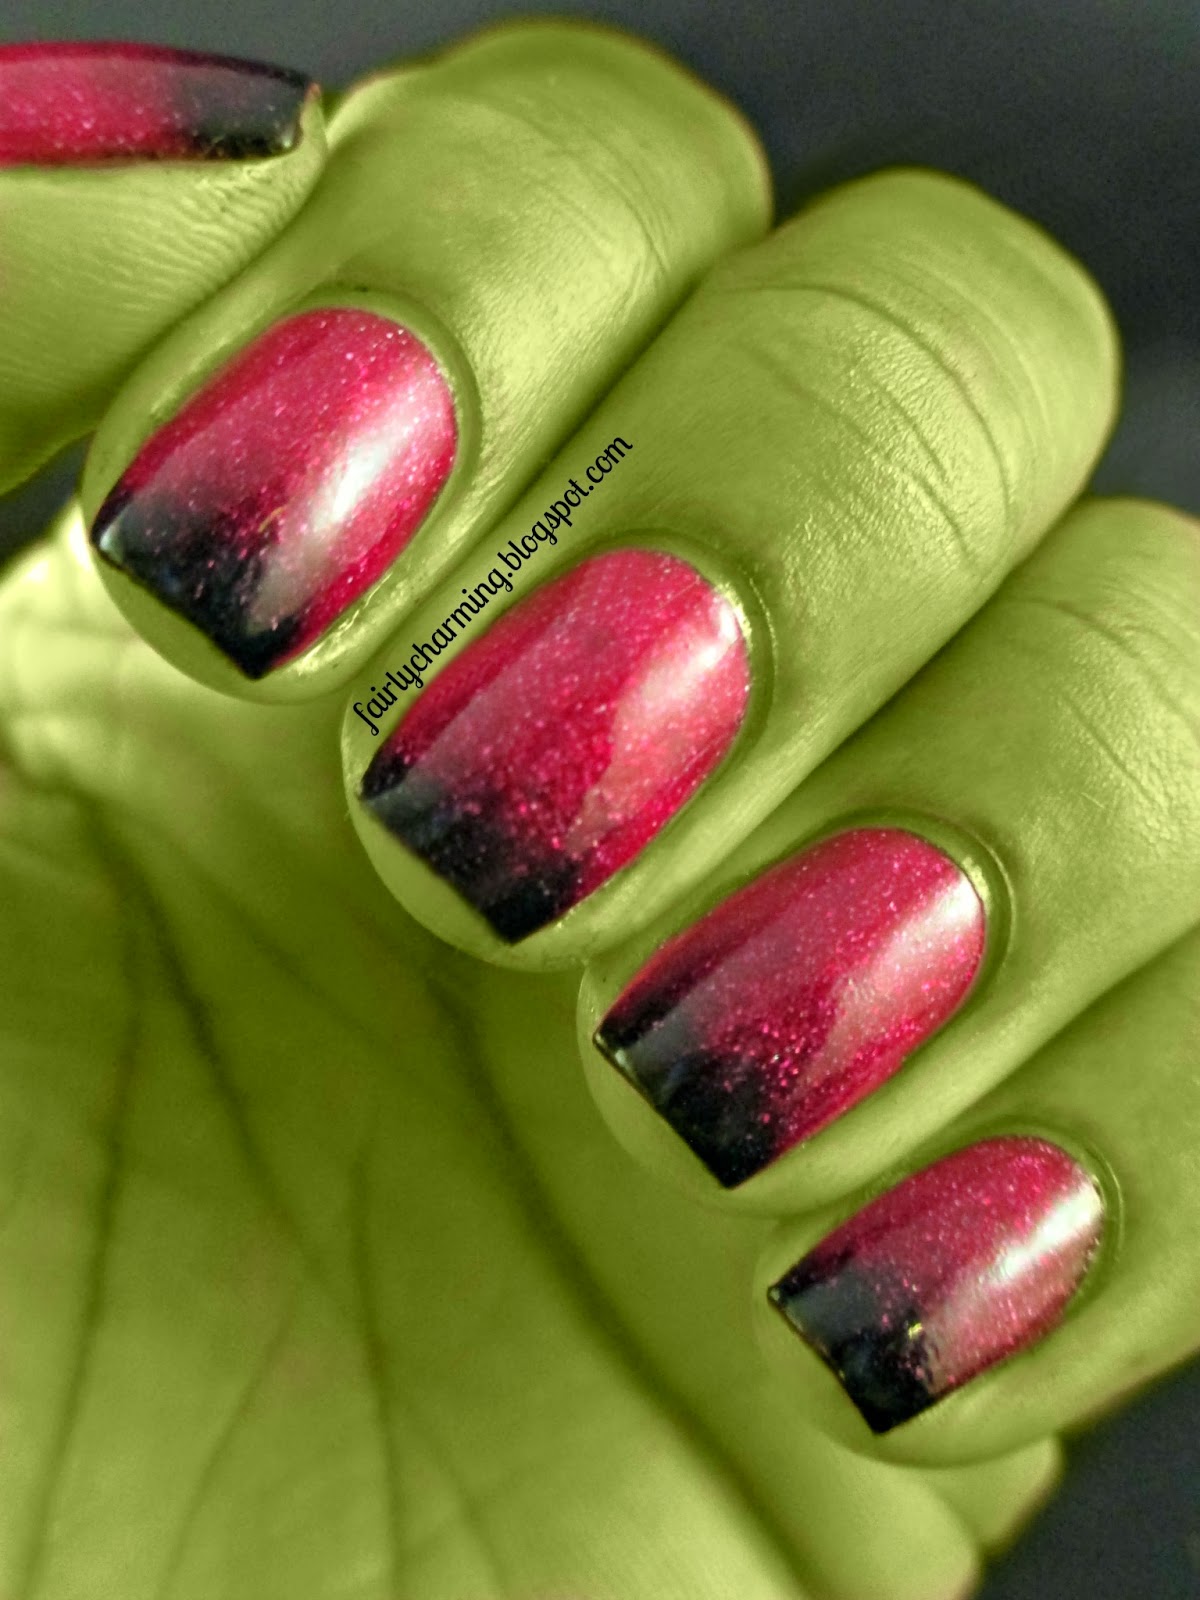
Anise Cosmic Kiss, ombre, gradient, black tips, holo, cranberry, Halloween, witch, nails, nail art, nail design, mani
 Colors Used: Anise - Cosmic Kiss, Rimmel - Black Satin

I would do ombre of course!  :D  Cosmic Kiss is a new pretty in my collection.  I found it while out shopping at DSW (who knew a shoe store would carry such gorgeous polishes??).  It's a cranberry polish that's packed with holo glitter.  As usual, I couldn't get the holo sparkles to photograph... at all.  *sigh*


 I used my photo editor to turn my skin green because, well... turning my dark skin any other shade with makeup would be a difficult task lol.


Success?  I'm thinkin' yea ;)


Happy Tuesday, my pretties... muahahahaha!

Until next time!

Stef <3

Monday, October 14, 2013

KKCenterHK Halloween Decals

Hello, dearies!

Today I have another Halloween mani to share with you.  I used some water decals that I received from KKCenterHK...


KKCenterHK, water decals, halloween, haunted house, witch, spooky, sunset, dusk, gradient, nails, nail art, nail design, mani
 Colors Used: Sinful Colors - Hazard, Julep - Evie and Trina

I started by sponging on a sunset gradient and then I went to work and the spooky design.

Did you know that there is a difference between water decals and nail tattoos?  I had no clue! Unlike the temporary tattoos that many of us played with as kids, these decals are not sticky on the front, a bit of a surprise for me lol. 


 You wet the back of the paper with water  and rhe decal will slide off.  It's very thin and tears easily, so I recommend using tweezers.  Again, since it's not sticky it is easy to adjust the decals in just the right place.  Once I had the houses and witch in place, I used a black striper polish to free-hand/fill-out the remaining fence and ground area.  I then top coated with Color Club Clear (my current fave).


I really love the way this one turned out!

Name: N.NAIL Halloween Witch/Haunted House/Bat/Broomstick/Ghost
Item #:  NNAIL-WDHHK188
Quantity: 1 Sheet
Cost: $6.39 USD
       
These decals, and others like them, can be found at KKCenterHK's online store! 
I'm really getting into the Halloween spirit this year!  What are some things you lovelies are doing to celebrate Halloween?

Until next time!

Stef <3

* This product was provided to me for review.  I received no payment or other compensation for the review of this product.  The opinions stated here are completely my own.  The contents of this review are based on my direct experience with this product.

Monday, October 7, 2013

Blue... You've Stolen My Heart!

 Hiya lovelies!

I've got a quick post for you today.  It features a skittle mani that I did using my new fave polish color, blue :D


Sally Hansen Laughie Taffy, Kleancolor Light Teal, blue, skittle, skittlette, ombre, gradient, cross stitch, stripes, textured, nails, nail art, nail design, mani

 Colors Used:  Sinful Colors- Midnight Blue, Orly - Dazzle, Sephora by OPI - Meet Me At The Disco, Kleancolor - Pastel teal, Sally Hansen - Laughie Taffy


You see, what had happened was... I needed an excuse to try out my newest SH Sugar Coat (Laughie Taffy).  I just love textured polishes and I'm trying my best to get one in each color of the rainbow lol.  Well, one thing led to another and I got a little carried away ;)  The cross-stitch is a new technique for me.  I haven't quite mastered it yet by I definitely plan to!  Haha...


Happy Monday!


I took time this weekend to just hang out with my hubby but I haven't forgotten about the Eiffel Tower tut.  I'll work on it tonight when I get home and have it up for you soon :)

Until next time!

Stef <3

Thursday, May 9, 2013

Almost Presentable Ombre

Helloooooo dahlings!

I didn't schedule a post today because life has been eventful.  I have some down time before work, so I thought I'd share a mani I did last week that's... well, it's alright.  It was really late when I did it and the cleanup was horrible :\  I do like the colors tho...

Wet n Wild Nerd Alert Screech, ombre, gradient, green, lime green, bright, neon, sponge, nails, nail art, nail design, mani
 Colors Used: Sally Hansen - White On, Love&Beauty - Light Green, Wet n Wild  - Nerd Alert Screech


Soooo yea... I used a makeup sponger to get a smother blend of colors.  I need more practice lol.  I know perfection is pretty much impossible to obtain, but it is something that I strive for.


I guess that's all for now hahaha...

Until next time!

Stef <3

Saturday, April 13, 2013

Church Mani: Grace and Yumi

Hellooooo!

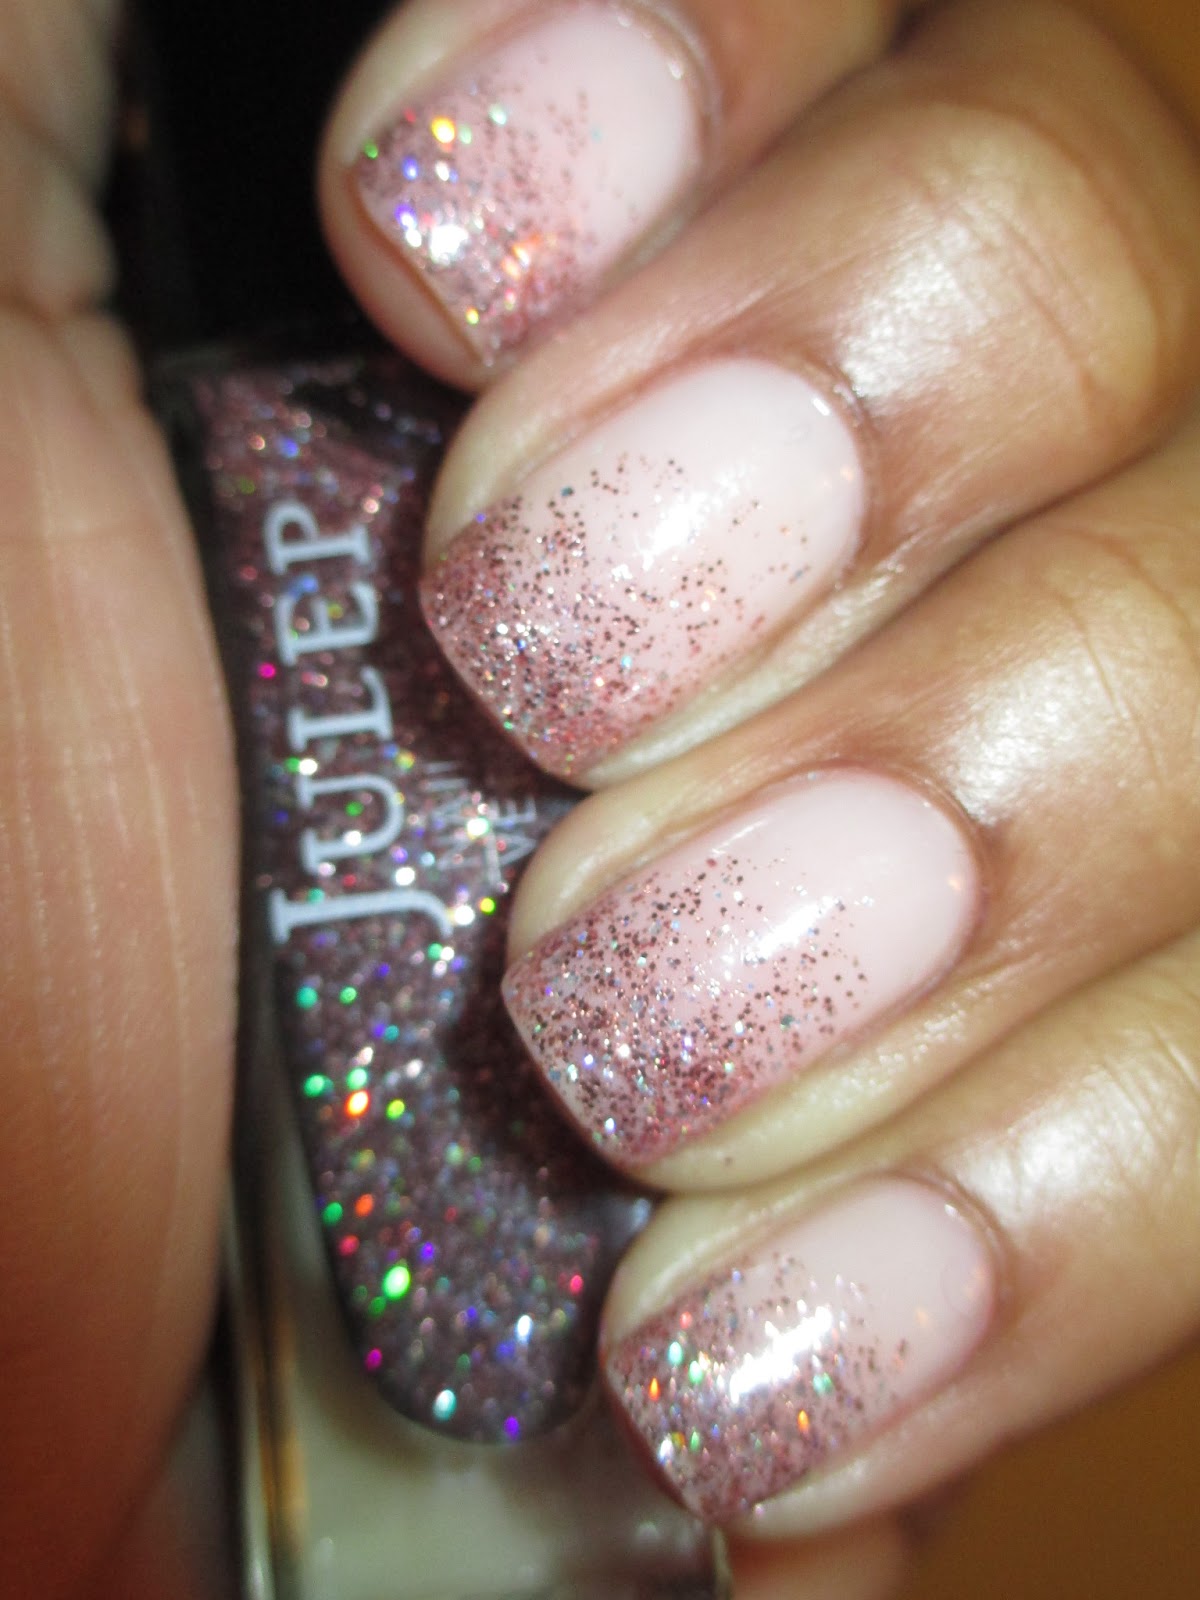
Today's church mani is a typical glitter gradient with an atypical glitter (please ignore the ouchy... on my thumb!).


Colors Used: Julep - Grace and Yumi

I have been waiting for Yumi to be available on Julep's website since they ran out of it last year.  It's such a pretty glitter!  Small flecks of dusty pink with medium sliver and holo's *sigh*...
 

I did 2 coats of Grace, which is a lovely, sheer, baby pink.  It applies like butter.  This I layered Yumi until I was satisfied with the gradient.  I started two-thirds of the way down my nail and then worked my way up.  I love that it is extremely subtle/borders on boring.  But in the right light the holo just pops!  I can't get enough of the holo look haha.


I hope you all have a wonderfully happy Sunday :D

Until next time!

Stef <3

Wednesday, April 3, 2013

Wild Shinies!

Hey there dolls!

It has been a crazy week and it's only Wednesday!!  I am so sleeeeppyyyyy ZZZZzzzzzzzz...

Well today's mani is a result of indecision and allergy meds lol...

Tribal, cheatah, leopard, pink, turquoise, glitter, nails, nail art, nail design, mani
 Colors Used: Love & Beauty - Strawberry, Julep - Amy, Color Club - Beyond the Mistletoe

The pictures are terrible but I think the mani is pretty fun!


It's very girly, I know.  But I'm running low on acetone and can't get to the store until friday so... blam!  I wanted something fun that I could rock for the rest of the week and feel alright about it lol.  The glitter is unbelievably shiny and has a pretty holo mix to it :)

Yay shinies :D

Until next time!

Stef <3

Tuesday, September 4, 2012

Church Mani: Frosted Tips!

Good day lovelies!  I hope you are all faring well :)

My posts have been inconsistent of late (as has my wedding planning lol).  It's been almost a month since my last Church Mani post, reason being... I'm too pooped to post!  By the time I get home from church (while it is fulfilling, it's still a job for me) I feel like my work week is finally done and I want to savor the remaining hours in the day with my honey, not behind a computer :(  Now that I'm back to my regular hours, I think I will be posting my Church Mani's on Monday mornings instead.  Not to fear, the series isn't over yet!

With that being said, here is my mani from this past Sunday...

Colors Used: Love&Beauty - Baby Pink and Silver Glitter

I am in love with this glitter!!  It makes me happy every time I look at it :D  I'm seriously considering doing this mani again for my wedding..


I applied 2 coats of the Baby Pink, which is an ultra sheer polish.  I then used the Silver Glitter for the tips.  I was trying for a faded effect ;)
Glitter tips, Love & Beauty, baby pink, silver glitter, nail art, nail design, mani
 I just can't get enough!
 Had to go for a ring shot lol.

Last one...


So, ladies... What do we think??

My next post will most likely be on my September Maven box and other Julep purchases :)

Until next time!  

Stef <3