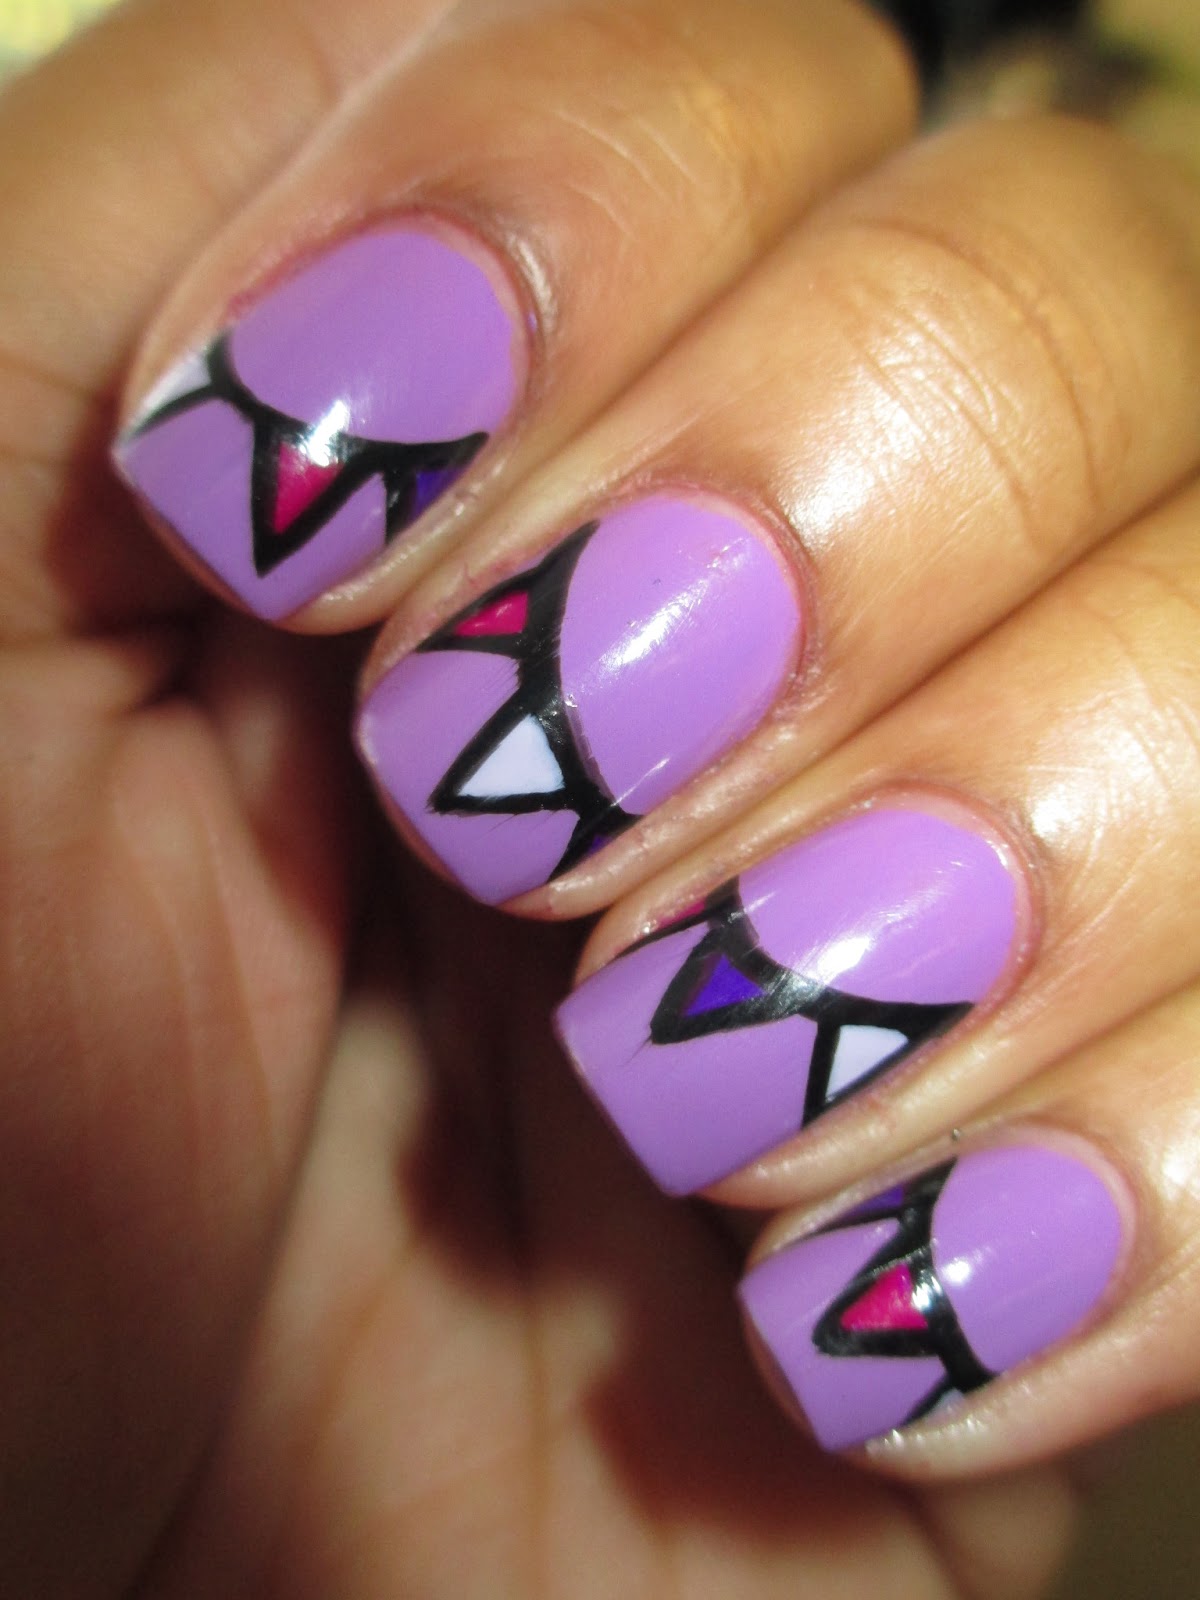
Showing posts with label Jesse's Girl. Show all posts

Monday, November 4, 2013

Nailed Kit Review

Hello, lovelies!

Yikes... I can't believe it's been a week!  I'm so sorry, I've been a little busy in life.  Then I took advantage of the weekend to just relax and have a good time with freinds and family.  Impromptu blog vaca I guess lol.  But I'm back and have so much to share with you this week.  Let's get started!

Today I have a fun DIY nail kit to show you (*disclaimer)...

  
Nailed Kit Is just what it sounds like... A nail art kit!  It includes all of the materials one might need to create some fun/fabulous/adorable nail art.  There are quite a few styles to choose from, but I decided to go with the Cupcake Birthday Kit...
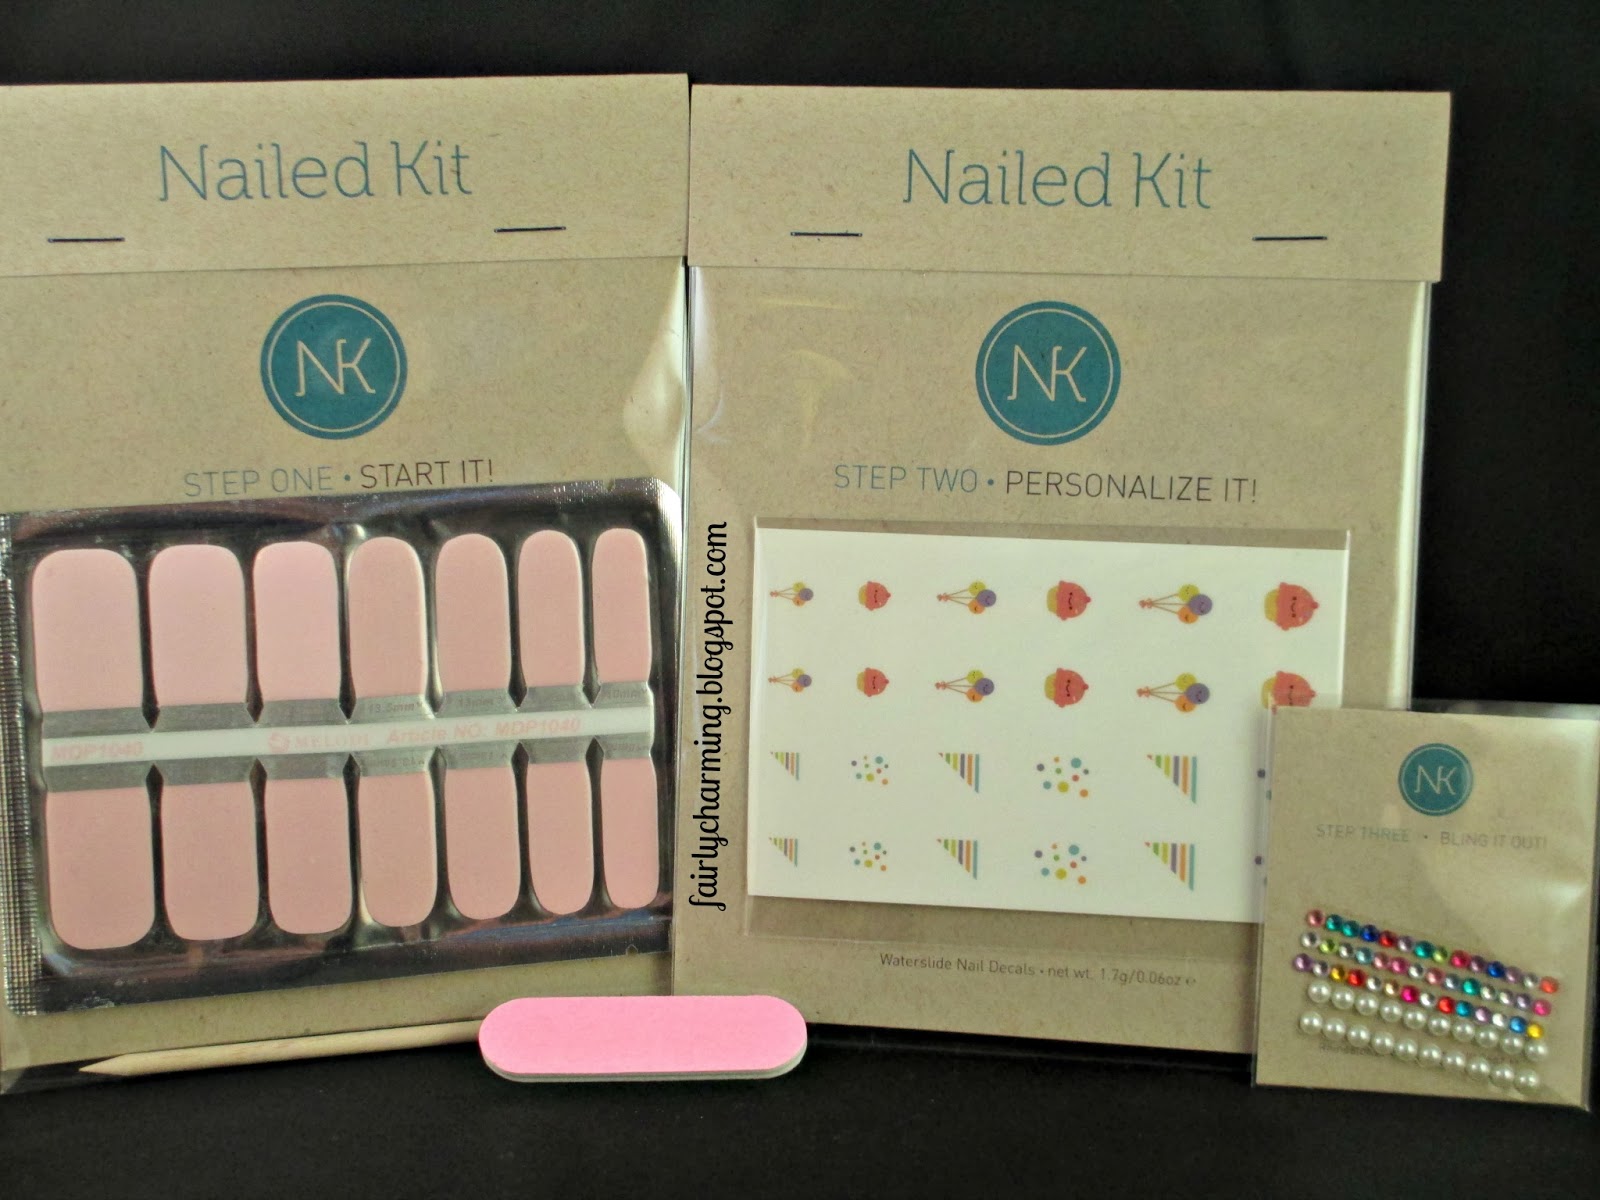
Nailed Kit, DIY nail art, subscription box, birthday, cupcake, all in one, nails, nail polish. nail art, nail design, mani

Inside the kit you will find nail polish strips, water decals, rhinestone/studs, an emery board and an orange stick.  Each packaged item has instructions on the back for application.  It's pretty fool proof... well, excpet for this fool lol.
 
Nailed Kit, DIY nail art, subscription box, birthday, cupcake, all in one, nails, nail polish. nail art, nail design, mani

The instructions for the nail strips said to stretch them over your nails.  Well, these bad boys (girls?) are really pliable and I actually LOVED the way that they looked.  Very much as if I had polished my the nails myself.  But... I was a little over zealous with the stretching and a few minutes later when I was ready to take some pictures, the strips shrunk back a bit and my nail line was peaking thru at the tips.  I'm a big dope!


So I pulled out the closest polish shade I could find (Color Club Endless) and all was right with the world lol.  The other polish pictured, for those who are curious, is Spellbound Nails Upelkuchen (birthday cake batter, I thought it was fitting haha).


I did a second mani I wanted to show the versatility of this box.  Polishes used here were Jesse's Girl Sprink Break, Sally Hansen Blue-Away and Lush Lacquer Clowning Around.  The one recommendation I will make when using this kit... the decals are pretty sheer so a really light base (I chose white) will help the color to pop.


There are so many options with this kit and this company.  You want to throw a nail party?  Awesome!  Get some food and drink and order a few kits for your gal pals... party hardy!  Or maybe it's a baby shower?  A bachelorette party?  They've got you covered.  You can also just buy a kit for yourself and create multiple manicures.  Aaaaand if you just want the cute little decals... you can do that too!  If you really love it, there are subscriptions boxes available as well.  So many choices!!  Nailed Kit is a really great option for anyone who is wanting to take the plunge into nail art :)

You can find out more about Nailed Kit via their website.


What do you guys think about this kind of box?  Let me know in the comments below :)

Until next time!

Stef <3

* This product was provided to me for review.  I received no payment or other compensation for the review of this product.  The opinions stated here are completely my own.  The contents of this review are based on my direct experience with this product.

Tuesday, March 26, 2013

Tri Polish Challenge - Day 3

Good morning, dearies!

Today's post features my third installment in the Crumpet's Tri Polish Challenge.  I decided to do something a little "sweet"...

Purple, Orly, Shine On Crazy Diamond, Green, Coral, Glitter, Candy, Lollipop, Tri Polish Challenge, March, Day 3, Sally Hansen, Green With Envy Jesse's Girl, Spring Break, nails, nail art, nail design, mani
 Colors Used: Jesse's Girl - Spring Break, Spoiled - Let's Get Sushi, Sally Hansen - Green With Envy, Orly - Shine On Crazy Diamond

I racked my brain for a looooong time trying to think of something fun/different to do with these polishes.  This challenge is a lot harder than I thought it would be!  Lollipops popped into my head and then I remembered a mani that Chalkboard nails did recently with little candies on them.  While hers are A LOT better, I liked the way this mani turned out :)


The Crumpet said that we had full use of glitters as toppers so I added 1 coat of Shine On Crazy Diamond to finish the mani :)


As much fun as I'm having... these polishes are going to be "put to bed" after Thursday.  I don't want to look at them anymore lol.  Don't forget to check out the other fab mani's for today's challenge :D

Until next time!

Stef <3


Tuesday, March 19, 2013

Tri Polish Challenge - Day 1

Hello, hello!

I'm so excited about today's post because I am starting my very first nail art challenge :D   Debbie over at The Crumpet is pretty well known in the nail blogging world.  She has come up with the most popular nail challenges that you can find on the interwebs and this latest one is pretty fantastic!

From what I gather she has gotten together with her friend Ashley and come up with the "Tri Polish Challenge".  Details can be found on her blog, but the idea is to create 4 mani's each month using the same 3 polishes.  Now this post is coming just under the wire because I was sick in bed when I got home from work and I forgot :\  But I really do want to participate in this challenge so... here we go!


The Crumpet Trip Polish Challenge, March, Day 1, coral, green, purple, polka dot, nails, nail art, nail design, mani

Because I'm not feeling so hot, I did polka dots this first go around. Quick and easy.  It's my favorite go to design :)


And these are my polishes for the month... Spoiled - Let's Get Sushi, Sally Hansen - Green With Envy, Jesse's Girl - Spring Break


*Sigh*... I lurvs polka dots!


I'm hoping to come up with some genius nail art ideas using these polishes, but... that may not happen lol.  I'll have another tri polish mani for you Thursday :)  Don't forget to check out the other awesome mani's below!

Until next time!

Stef <3


Monday, March 11, 2013

Purple Bunting for Epilepsy Awareness

Hello dolls!

I am very excited about today's post!  I created a purple mani in support of Epilepsy Awareness Month.  Nail Narcotics is doing a series on her blog to spread the word about this neurological disorder and I'm thrilled to be able to spread it a little bit farther...


Jesse's Girl, Spring Break, Wild Thins, Essie, Lilacism, purple, bunting, spring, nails, nail art, nail design, mani
Colors Used: Jesse's Girl - Spring Break and Wild Thing, Essie - Lilacism, Urban Outfitters - Bandeau


Spring Break is definitely the refreshing color I needed to be rocking today.  I've been looking at my nails all day, smiling like a fool lol.  I've received quite a few compliments on my nails today and it's been a great way for me to spark up a discussion about epilepsy.  Here are some myths/facts about the disorder that Nail Narcotics posted to her blog...

MYTH :You can swallow your tongue while having a seizure.  
FACT:
For those of you who took biology or have a tongue of your own you will notice that its connected to the bottom of your mouth.(if you sense sarcasm its because I'm laying it on pretty thick)
MYTH: People with Epilepsy are disabled
FACT:
 People with Epilepsy have the same range of intelligence and abilities as everyone else.  Physically and mentally we are no different!
MYTH: Epilepsy is a disease
FACT:
 Epilepsy is chronic medical condition. You can not catch it
MYTH:  You can’t die from epilepsy 
FACT:
You can! Prolonged seizures can result in death. 


 To learn more about epilepsy, check out her blog/postsIt's also a great way to get a look at some fabulous purple mani's ;)

Until next time!

Stef <3

Saturday, July 14, 2012

Indian Summer Frenchie


Good morning, all!  I'm excited that it's the weekend, I need the break lol.

I am very sorry that I didn't post last night, like i said I would (I'm such a liar!!).  I was out with some wonderful friends and my honey.  It's been a while since we'd hung out so I was in no hurry to get home.  Hence I was exhausted when I finally was home and I went straight to bed :(  So yea, there's my apology and lame excuse lol.  Moving on!

I've been feeling like I'm in a mani rut for a while.  So I've taken the advice of Shiko (friend and fan) to look at YouTube videos for inspiration.  I came across one that Sephora put up called Indian Summer.  It combines the neon-y purple that's very popular right now with their 24 k gold topcoat (I believe it costs $30).  It's a beautiful combo and I loved it instantly!  I don't like the price of that topcoat however hahaha.  So this is what I came up with...

 Colors Used: Jesse's Girl - Wild Thing, Sally Hansen - Golden-I, Love & Beauty - Gold


I used the same sweeping technique as with the fishtail nails to get the curved tips (Wild Thing).  I then applied Golden-I with a striping brush. The Gold (glitter) was an afterthought that I slapped on at the end hahaha.  This mani was so fun and pretty, I wore it for 3 days *gasp*!  

I hate hate hate that I couldn't get a decent picture of it, so I bought a camera (a Cannon Powershot) first thing after work yesterday :D  But for now you'll have to deal with one more awful-terrible-no-good-very-bad-stupid-cell-phone piktar...

Indian Summer, french tip, frenchie, Jesse's Girl Wild Thing, Sally Hansen Golden-I, nail art, nail design, mani

So there you have it, my twist on an Indian Summer :)

I have a polish haul to share with you if you're interested ;)  After the jump of course!

Tuesday, June 19, 2012

Bye Bye Spring!

Hello there!  How are we all doing today?  Summer camp started off with a day of craziness and I'm still trying to recover lol.

Well, today I am saying goodbye to my favorite season of the year... Spring *sniff*.  I loved the pastels of this past season (especially all of the mint polishes that were available).  So here it is...

Whimsical, Mint Sorbet, purple, frenchie, fishtail, nail art, design, mani
 Colors Used: Sally Hansen - Mint Sorbet, Revlon - Whimsical, Jesse's Girl - Spring Break, Sally Hansen - White On

Fun and cute, this mani was a cinch.  I'm in a kind of nail design rut (I'm open for suggestions!) and I'm unsure of what to try next.  Maybe a challenge?  Or a series on the nail fails in my picture vault??  Lol I dunno, I'll figure something out I'm sure.


One last piktar...


My next post (when I have time to sit and type it up) will be on my most recent trip to a nail salon with my sissy-in-law-to-be.  Boy, was that an experience!  Hahaha...

Until next time!

Stef <3

Friday, May 25, 2012

Swatch and Compare :)

Oh-lo friends!  It's the weekend... woohoo!!!  :D  I promised that I would have a swatch / comparison for you this week so let's get to it :)

This is the completed mani (for thumbnail's sake)...


And now the story... A while back I bought Sinful Colors - Dream On

I bought the polish because it was so pretty and bright in the bottle.  I assume that it's a dupe for Illamasqua - Stance.  The first time I applied Dream On, it dried really dark!  I was soooo bummed :(  I decided to go hunting for another.

I found Jesse's Girl - Wild Thing while out shoping with my friend, the Fashionista :)
My bottle has a tall thin cap not this big square one... strange!

We each bought a bottle because, along with me, she thought that her bottle of Dream On was a little deceiving.  Surprise, surprise... Wild Thing dried dark too *sigh*. 

I personally can't really see a difference in the two polishes but I'll let you decided for yourself...

Neon, purple, Dream On, Wild Thing, swatch, nail art, mani
 I applied 3 coats of each polish. Dream On is thumb, middle finger and pinky.  Wild Thing is index and ring fingers.

Neon, purple, Dream On, Wild Thing, swatch, nail art, mani


 Neon, purple, Dream On, Wild Thing, swatch, nail art, maniNeon, purple, Dream On, Wild Thing, swatch, nail art, mani

In certain lighting / angles Dream On looks slightly darker than Wild Thing.  Other times they look exactly the same.  Very frustrating!

I have seen swatches online of Illamasqua - Stance and it seems as if that polish dries dark as well :'(  I've come to terms with the fact that the color I am looking for is unattainable, and that is ok.  

Of course I couldn't walk around with just plain polish on my nails... So I busted out the laser tape that I got from Amazon a while back and my handy-dandy dotting tool (it's just a polka-dotty kind of week I guess lol)!


Neon, purple, Dream On, Wild Thing, swatch, nail art, mani

My frustration turned into immediate joy and I was a very happy lady!

Again I just wanted to say thanks for all of the lovin'!  You guys rock :)  And just a reminder that I plan on having a giveaway when I reach 25 followers (tell yo friends... yes... I said YO)!  Lol...

Until next time!

Stef <3

Thursday, May 24, 2012

What's Your Flavor?

Happy happy HAPPY Thursday everyone!  I love Thursdays because they are my last day of work for the week and then I have a 3 day weekend to look forward to (altho I suppose I technically "work" at church on Sundays.  But it's a labor of love so it shouldn't count hahaha).

Today's mani is inspired by the one thing I can NEVER say no to... it's my Kryptonite... Mint-chip ice cream!  *sigh* I love it so very much, probably a little too much :P  I've been craving it for weeks and still haven't gone out to get any :\  The other night I finally mustered up the energy to go to the store only to come to the realization that it was closed.  I was going to whine about it but instead decided to get creative...


Mint, mint chip, ice cream, drip, nail art, mani

 Colors Used: Sally Hansen - Mint Sorbet, Sinful Colors - Nirvana, Jesse's Girl - Spring Break, Sally Hansen - Mellow Yellow, Sally Hansen - White On

I'd seen this drip nail idea on quite a few nail blogs and YouTube tut's and I thought it would go well as a sort of sundae look.  I went digging around in my fimo box for cherries but the only ones I could find were 2 attached to a stem, not quite right.  So I opted for strawberries :)

For those who are curious, I used my biggest dotting tool to draw the fudgey drips.  This is definitely a look I'm going to try again in the future to see if I can improve on the drippy look.

One last photo to send you off with!
 
 Mint, mint chip, ice cream, drip, nail art, mani

I'd just like to say that I really love and appreciate all of the positive feedback that I've been receiving from you all!  You guys are amazing and I love you *gasp*... I said the L word!  Hahaha :P

Please feel free to comment and let me know what you think :)  If you have a suggestion for a mani you think I should try out or if you have any questions about how / what I do, leave those in the comments as well :)  Also, follow me!!  If you look on the left side toolbar you'll see a little thing that says "followers".  Click join this site and then I'll know that you're following me and I can send some love your way (I have a sneaking suspicion that there are more than 19 of you lol).  If I get to 25 followers I plan on doing a giveaway... because you guys are awesome and deserve one :D

Soooooo, with that being said...

Until next time!

Stef <3

Tuesday, May 8, 2012

Naked Nails, Products & Hauls... Oh My!

Hey there lovelies!

I don't think I've mentioned it but, along with learning / doing nail art, this is my first attempt at growing out my natural nails.  I've decided that I want to document this with pics and some comments through my blog.  I do apologize if this does not interest you in the slightest, BUT... I also will be sharing nail polish hauls and some products that I absolutely love and use on a very regular basis.  So, stick around :)

The following pics are of my left and right hands just after I removed the polish from yesterday's post...


The very first thing I noticed was that I take way better care of my left hand (the "modeling" hand) than my right hand... and that just seems a little unfair, so I shall be remedying that soon lol.  They don't look too terrible but I do have some splitting at the tips that I'm dealing with.  I bought some crystal nail files and I hope that they will correct this problem :\

I've had a couple of people ask me what happened to my left ring finger and I thought I should fill you all in.  I'm a dumb.  And a klutz. I was removing those purple fimo bows with M.A.S.H.'s super pointy nail art tweezers and I slipped... and gashed my finger pretty good.  It's healing faster than I thought and I'm sure my hand will be picture perfect again soon lol.  Now onto my polish hauls and favorite products!

Wednesday, May 2, 2012

A "Whimsical" Mani!

Greetings, friends!  It's mid-week and I'm just truckin' along with my mani's:)

Around a week ago I posted about my first trip to an Ulta store (which was amazing!).  While I was there I stumbled upon Whimsical by Revlon.  I've seen this polish on a lot of nail blogs and I was so excited to find it for myself but I had no idea how I was going to incorporate it into a mani... until now...

French tip, frenchie, blue, purple, whimsical, fimo, bow, glitter, nail art, man

French tip, frenchie, blue, purple, whimsical, fimo, bow, glitter, nail art, man
Colors Used: Essie - Borrowed & Blue, Revlon - Whimsical, Jesse's Girl - Spring Break

I LOVE the way these turned out!  I put Essie on my tips before I applied the Revlon (because it's very sheer and I wanted the colors to pop!) and then I used a striping brush to apply the purple.  I brushed on a layer of top coat (Seche Vite) and then applied the fimo bows with glue.   I have some minor staining on my index finger that I plan on buffing out later (I think it came from the SH - Golden-I; I messed up that nail and had to start over and I think I forgot to redo the base coat).  Overall, I'm really happy with this mani :)

I've said that I want to do more than just nail art with this blog.  I want to share tricks and tips that I learn with you, so I'll start with a trick I learned on how to remove glitter polishes (they're such a pain!).  Click "Read More" to view the tutorial :)